Published On Feb 19, 2021
Welcome to my channel, Homes for Beginners where I show you how to do repairs around the house yourself. Please don't forget to hit that LIKE button and SUBSCRIBE for future videos.
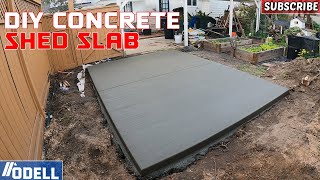
This video is the first of the garage project we’re building. I’ll be going through the process, everything that has been required, from start to finish. This is being built in Ontario, Canada, so some of the requirements and building processes may vary depending on your location. This is a 15’x24’ garage, between and single and double car. Due to the land terrain and budget, this is the best suitable option for us. My mom and I will be building this garage, the only work which will be subcontracted out is the concrete floor.
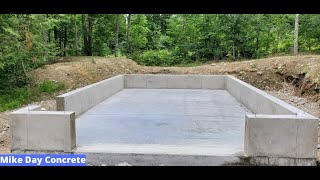
First was drafting up the plans for the garage, due to the garage being closer to the road than the house, we needed extra approval through the municipality. An application was submitted, along with a paid fee, then we had the one month wait for the committee gathering where we presented our plans and this was then voted upon. Once accepted, then full plans were submitted for the building permit. The building permit required a full site plan, location of the septic system, existing building outlines, setback and property lines, and full dimensions. The garage did need to meet within setback and height requirements and this information can be found on a municipality’s by-law documents. Required drawings were the four elevations, pad layout, floor plan, truss layout, and wall sections. Due to keeping the costs down, this will be 2x4 construction is a floating slab. Not all areas will allow a floating slab, some areas will even have a maximum square footage such as where we live.
While we were waiting for the approvals, we started excavation of the area. Being sand, it was fairly easy to dig by hand despite running into roots. The first step was stripping the grass from the area, this was then taken to the local dump and disposed of. This can be easily done with a shovel. After that, we stripped back the soil to keep for future use as we’re redoing the yard. After that was wheelbarrowing the sand out of the area. Now you may be asking yourself why we didn’t use a machine. Due to the septic system being in the backyard, we didn’t want to risk damaging the system with any heavy equipment. We have a fairly hilly yard and wanted to level out the section past the septic area, along with replacing some of the gravely soil in some areas. In the backyard, we backfilled the area about 12-16 inches. So this not only saved money for us purchasing sand to backfill the yard, but we also didn’t have to pay to truck out any sand. In our area, they typically charge about $600 for removal of dirt per dump truck and this doesn’t include hourly rates for digging equipment. To purchase a dump truckload of sand, can cost around $800. In our spare time and working around the rain, this took about a month to dig but could be easily done in under 2 weeks working at it every day.
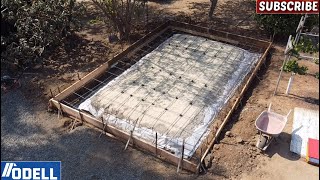
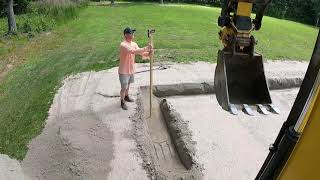
We’ve already had the concrete contractor mark out the location of the pad as showing by the orange paint on the ground. With the sloped terrain about the house and driveway, the floor height of the garage will sit about 20” higher than the house. Having it too low may risk having water pooling on the pad, either coming from the driveway or side yard. To level the area, a base point was taken from the driveway wood ties, this will be the top of the pad. 5” was then subtracted from this base point, this will be the bottom of the pad. The garage floor is 5” thick. A laser level was used here, this can be set up with different accuracy ratings, I believe this is within a 1/4”. The base must remain undisturbed, otherwise, this will create an unstable foundation which would result in the structure shifting.
The area closer to the laser, is on the house side, the grade does drop and it’s not ideal to raise this area with dirt. So the pad will be slightly thicker on this side and to account for any potential risk of washout, this is where the integral footing will be substantially thicker than compared to the rest of the pad. This has been shown on the drawings. On the house side, the footing is 20” thick, there is a transition on the front and rear, then the rest of the footing is 14” thick.
© Homes for Beginners 2019
All Rights Reserved
No part of this video or any of its contents may be reproduced, copied, modified or adapted, without the prior written consent of the author.