Published On Mar 15, 2016
Learn how to build a walk-in shower in this Part 1 video. We use the Wedi Fundo Ligno curbless shower pan.
For more home improvement tips visit https://www.homerepairtutor.com/👍🏼
0:00 How to Install the Wedi Fundo Ligno Shower Pan
1:00 How to Recess the Subfloor for a Curbless Shower
5:20 Tips on Installing the Rough-In and Diverter Valve
6:30 How to Mix the Thin-set
7:03 How to Assemble the Drain
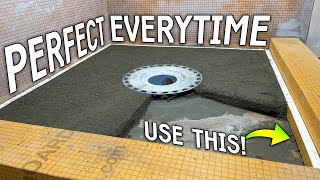
9:57 How to Install the Shower Pan
To make building a walk-in shower easier try these supplies:
Circular Saw -- http://amzn.to/1RFZorv
Utility Knife -- http://amzn.to/1RWUS7f
Reciprocating Saw -- http://amzn.to/221isW7
Diablo Demo Blade (for Reciprocating Saw) -- http://amzn.to/238rpzt
Hammer -- http://amzn.to/1RFZAHm
Super Bar -- http://amzn.to/231mrHY
Pry Bar -- http://amzn.to/1RWVpGf
4 Foot Level -- http://amzn.to/1qoC5vE
Liquid Nail -- http://amzn.to/1qoC76V
Caulking Gun -- http://amzn.to/1RFZUG2
Framing Nailer (optional) -- http://amzn.to/231nqbo
Impact Driver -- http://amzn.to/1qoCgHs
Deck Screws -- http://amzn.to/1ZVvB3v
Measuring Tape -- http://amzn.to/1RG068a
Spade Bit -- http://amzn.to/1qoCiz1
Jigsaw -- http://amzn.to/1RWWCNK
Mixing Paddle -- http://amzn.to/1RWXimo
1/2" Mixing Drill -- http://amzn.to/1RG0Jyx
1/4" by 1/4" Trowel-- http://amzn.to/1RG0Muf
Some product links may be Amazon affiliate links. As an Amazon Associate we earn from qualifying purchases at no additional cost to you.
---------------------------------------------
Today we'll show you how to install the shower pan. Fortunately this is waaaaaay easier than it use to be...especially if you use the Wedi Fundo Ligno. You can cut the Ligno to any size you want. They also come in pre-cut dimensions, so make sure you pick a size that fits the shower you'll build.
Once you have the pan you'll have to cut out the existing subfloor. If you subfloor is 3/4" plywood you're in for a treat. If you remove the section where the Ligno is going you'll be able to install the pan in one day.
Add 2x4 nailers to the joists and make them 3/4" below the the top of the joist. Apply Liquid Nail to the nailers and nail or screw them to the joists. Then apply Liquid Nail to the top of the nailer and add OSB or plywood to the joist gap. What you're doing is creating a subfloor that's 3/4 of an inch lower than the adjacent subfloor.
Put together the Wedi Ligno shower pan drain using Wedi's sealant. It only needs to be hand tightened...doesn't get any easier my friend. Mix up latex modified thin-set and back butter the Wedi Ligno shower pan. Apply the same thin-set to the subfloor and embed the Ligno shower pan into the thin-set.
BOOM, it's that easy.
#showerpaninstall #diyshowerrenovation #walkinshower
Want our newest DIY videos? Subscribe to our channel and hit the notification bell to see every upload. We upload new videos every Saturday.
Disclaimer:
Videos produced by Home Repair Tutor are provided for informational, educational, & entertainment purposes only. Some of these projects, materials, and techniques may not be appropriate for all ages or skill levels. Home Repair Tutor does not make any claims of the safety of the projects, techniques, or resources listed on this site and will not take responsibility of what you do with the information provided by this site. Viewers must be aware by doing DIY projects on their homes they are doing it at their own risk and Home Repair Tutor cannot be held liable if they cause any damage to their homes. Home Repair Tutor cannot claim liability with all applicable laws, rules, codes and regulations for a project.