Published On Aug 4, 2023
Check out my 2nd channel, TT Racing: / @ttracingyt
It’s time for some home based injection molding. I’ve had this machine since 2014, but it has been sitting idle for a while now, due to an error on my part. In this video, I start the process by cleaning and repairing to get it almost back to working order.
Please note that this machine is sold to suit 110V mains voltage. In Australia we use 220V, and I’m pretty sure I removed one heater and converted the other. If you also use 220V, you would need to do the same or use a step down converter.
Hopefully the new o-rings work well, but in any case, I’m considering casting some high temp silicone washers so I can push the temperature as necessary.
In part 2, the plan is to machine and mold and create something.
0:00 Introduction
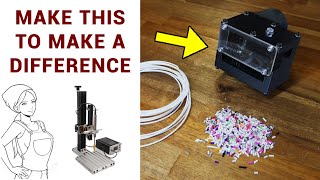
Precious plastics shredder video: • Recycling waste 3D prints with a Prec...
3D printing vs injection molding: • Why 3D printing is amazing! (but will...
1:01 My home injection molder: https://stores.jacobsbaits.com/inject...
Demo video: • Jacobs Baits - Bait Mold Injection Pr...
Plastisol wiki: https://en.wikipedia.org/wiki/Plastisol
2:34 Modifications
3:04 Cleaning
3:28 Height adjustment mechanism repair
4:51 Tear down and Valve rod unseizing
9:53 Rewiring the heating element
11:20 Basic testing
PID controller manual: https://www.maxwell-fa.com/uploadfile...
12:01 Conclusion
Recycling logo image by Ilmari Karonen: https://en.wikipedia.org/wiki/File:Re...
Buy quality and affordable filament from X3D. Buy 3, get 1 free and a free sample pack with every order: www.x3d.com.au
Get Quality Resins from 3D Printers Online. 5% off storewide for Teaching Tech subscribers [Code: tech5]
https://3dprintersonline.com.au/
Take a look around and if you like what you see, please subscribe.
Support me on Patreon: / teachingtech