Published On Aug 15, 2021
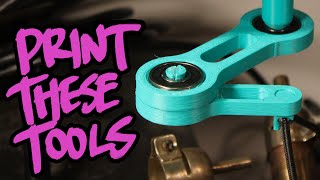
Here is the BLTouch version I am using in this video:
https://amzn.to/3p6XeLA
Recommended upgrade for any Ender 3:
Yellow bed springs - https://amzn.to/3xQdPVK
or to take it a step further - https://amzn.to/33LPTde
These springs make auto bed leveling easier on your Z stepper motor. Or you can go with these rubber spacers that some people call one and done “springs”: https://amzn.to/3gdQ8AN
Here is the BLTouch version I am using in this video: https://amzn.to/3maFHll
It has been working great for the last year.
I made this video as short and no fluff as possible while also commenting on some important info to help you get it just right.
You will need to install the correct Creality firmware (or 3rd Party firmware) in order for the BLTouch to work properly.
Here I go over calibrating the Z offset for the Ender 3 V2 with the BLTouch V3.1 which I installed in a previous video. This is a simple follow along that I made straight forward and to the point. Your Z offset may be different than mine depending on your hotend and nozzle, so don't use the same exact values I use, but instead, just get your nozzle close using the same process (and possibly different Z-offset numbers) I used, making sure not to lower your nozzle and hit the bed with it.
Amazon Affiliate:
Anything you purchase through these link helps my family and I out and doesn't cost you an extra cent.
As an Amazon Associate, I earn a small commission from qualifying purchases.