Published On Mar 18, 2019
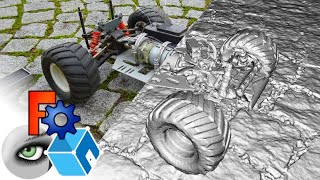
Learn to convert a 3D Scan into a STEP file (solid model). This detailed tutorial will show you how to make a reverse engineering of a mechanical part using the free software FreeCAD & Netfabb. Step-by-step guide on the blog: https://holocreators.com/blog/how-to-...
Converting mesh files to solid formats is a complex task, but in this in-depth tutorial we will show you how to convert STL to STEP. There are other software packages specifically made for reverse engineering, but with these tools you can do it for free.
Link to short video for quick overview:
• How to Convert STL to STEP using Free...
Software to do this tutorial:
Original 3D scan of the part (STL):
https://www.dropbox.com/s/2dkk6vczsj1...
Reverse engineered part with FreeCAD (STEP):
https://www.dropbox.com/s/1sl3f99dxh0...
Deviation analysis of 3D scan and reverse engineered part (PDF):
https://www.dropbox.com/s/h9etsqar4g6...
GOM Inspect Software (Software for the creation of a deviation analysis):
https://www.gom.com/3d-software/gom-i...
Netfabb (version 7.4.0) (Software for measuring the 3D scan):
https://github.com/3DprintFIT/netfabb...
Netfabb (current version) (Software for measuring the 3D scan):
https://www.autodesk.com/products/net...
FreeCAD (free CAD software):
https://www.freecadweb.org/downloads.php
Timestamps:
00:00:00 Introduction
00:03:34 Step 1: Importing our model into FreeCAD using our sketch from Netfabb as a reference
00:03:15 Step 2: Placement of model in FreeCAD
00:10:12 Step 3: Creating the sketch for the flange
00:23:40 Step 4: Creating the six extrusions in the flange
00:30:34 Step 5: Creating the holes inside the six extrusions
00:31:53 Step 6: Creating the middle section of our model
00:50:51 Step 7: Creating the top section of our model
00:58:14 Step 8: Creating the inner section of our model
01:09:55 Step 9: Creating a Loft body using all our sketches
01:15:05 Step 10: Creating the top cover
01:23:44 Step 11: Creating the circular extension on the top section of our model
01:39:31 Step 12: Subtracting the cylinder from the top circular extension
01:42:01 Step 13: Creating the cube detail on the flange
01:46:19 Step 14: Creating and subtracting the cylinders from the cube
01:53:32 Step 15: Creating a subtracting the screw form the cube
02:01:18 Step 16: Uniting all our parts
About Holocreators:
Holocreators is a 3D-Scanning and Reverse Engineering Company. We'd love to help you with your projects. Please call us +49 40 481133 or write to us an email.
Email: [email protected]
Website: https://holocreators.com/
Subscribe to the Holocreators Youtube Channel:
/ @holocreators
Connect with us:
Website: https://holocreators.com
Youtube Channel (English): / holocreators
Youtube Channel (German): / @holocreatorsde
Facebook: / holocreators
Twitter: / holocreators
Reddit: / holocreators
LinkedIn: / holocreators
Instagram: / holocreators
Hashtags:
#reverseengineering
#3dscan
#3dscanning
#3dscanner
#3dprinting
#cad
#3dprinter
#3dprinter