Published On Nov 11, 2022
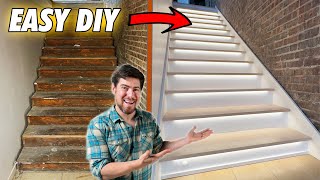
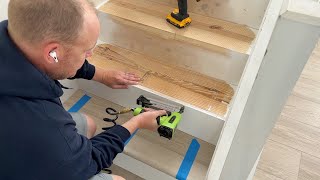
Learn how to complete a DIY Stair Remodel on a Budget with this step-by-step instructional video! When I bought my home, the basement stairs were covered with nasty carpet. After removing the carpet, I was left with a bare staircase that was in need of some serious DIY remodeling. In order to save money, I transformed the stairs using budget friendly tools and materials that you can pick up from any big box store. This video will show you how to prepare the old staircase for new stair treads, nosings, and risers in a DIY step-by-step manner.
🛠 🧰 Below are some "must have" tools and materials for this stair remodel project:
Plywood Sheets: https://www.homedepot.com/p/1-4-in-x-...
1"x2" Pine Nosing Strips: https://www.homedepot.com/p/1-in-x-2-...
Wood Conditioner: https://amzn.to/3togp5o
Gel Stain: https://amzn.to/3A9VvuF
Polyurethane: https://amzn.to/3G8LyBC
Tape Measure: https://amzn.to/3HaTWgE
Circular Saw: https://amzn.to/3BFotC4
Level: https://amzn.to/3HowUDn
Brad Nailer (Option 1): https://amzn.to/3WVoEni
Brad Nailer (Option 2): https://amzn.to/3NYoZBq
Orbital Sander: https://amzn.to/34UwlUD
Bar Clamps: https://amzn.to/3JjFrJe
Router: https://amzn.to/3G5cKkE
3/4" Roundover Bit: https://amzn.to/3fZYIpQ
Painter's Tape: https://amzn.to/3T4K5Q4
Construction Adhesive: https://amzn.to/3NYpj36
Cost Breakdown for Materials is Below:
Plywood for Treads = $37 (X2) =$74
Pine Strips for Nosings = $7 (X4) = $28
Wood Conditioner = $10
Gel Stain = $24
Paint = $20
Polyurethane =$15
Miscellaneous Costs (sandpaper, construction adhesive, etc.) = $25
TOTAL PROJECT MATERIAL COST = ~$196
For even more detailed information on the stair remodeling process, check out my "Stair Remodel" Blog Linked Here: https://atimprovements.com/how-to-rem...
Be sure to subscribe and hit the notification bell so you don't miss any future videos that are part of the Basement Renovation Series!
Follow me on Instagram: / atimprovements
Check out my Blog: Atimprovements.com
Subscribe to my YouTube Channel ⬇️ https://www.youtube.com/c/AndrewThron...
Check out my Website for additional DIY Content: https://atimprovements.com
▬▬▬▬▬▬▬▬▬▬▬▬▬
🎥 MY YOUTUBE GEAR
Camera (Iphone Max): https://amzn.to/3d5HxSo
Microphone (Maono Condenser Mic): https://amzn.to/3RCAb7N
Tripod: https://amzn.to/3Rz5Gj3
Mini Tripod: https://amzn.to/3Rvt2WM
Lighting: https://amzn.to/3d4QdZ5
▬▬▬▬▬▬▬▬▬▬▬▬▬
🛠🧰 TOOLS THAT I USE
Carbide Tipped Drill Bit: https://amzn.to/3S0hdIM
Tapcon Screws: https://amzn.to/3OxEWxh
Drill: https://amzn.to/3JICKkk
Tape Measure: https://amzn.to/3HaTWgE
Circular Saw: https://amzn.to/3BFotC4
Masonry Drill: https://amzn.to/36yP1JW
Level: https://amzn.to/3HowUDn
Hammer: https://amzn.to/35fIpiT
Chalk Line: https://amzn.to/3MwSDg8
Clamps: https://amzn.to/3HLqwpK
Drill: https://amzn.to/3JICKkk
Sawzall: https://amzn.to/3HcdeSI
Circular Saw: https://amzn.to/3BFotC4
Jig saw: https://amzn.to/3I6lcyd
Air Compressor: https://amzn.to/34TatJf
Framing Nailer: https://amzn.to/3JGpBYU
Roofing Nailer: https://amzn.to/3BEAuYF
Orbital Sander: https://amzn.to/34UwlUD
Bar Clamps: https://amzn.to/3JjFrJe
▬▬▬▬▬▬▬▬▬▬▬▬▬
Thank you so much for watching!
*All content on the Andrew Thron Improvements YouTube channel reflects my own opinions. Please seek out guidance of professionally trained and licensed individuals before making any decisions. Links in the description may be affiliate links.