Published On Oct 5, 2019
#timingbelt #toyotatundra #aisin
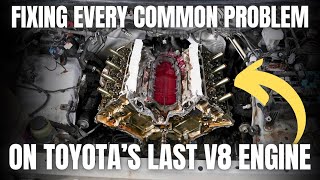
This video is a complete step by step process to replace the timing belt on a Toyota 2UZ-FE V8 engine. Most of these engines appear in Tundras and Sequoias up to 2004, but also in Land Cruiser, Lexus and a couple years of 4 Runners. We also replace a whole kit and other parts associated with the timing belt. The kit includes the belt, tensioner, idler pulley, bearing pulley, and water pump and gasket. In addition, we replaced the fan pulley bracket, the fan clutch, the accessory belt, the accessory tensioner and idler pulley and the upper and lower radiator hoses.
Some tools needed include:
Torque wrench
Metric socket set, deep and standard
Phillips and flathead screwdrivers
Slipjoint pliers, taped
Long handle needle nose pliers
Camshaft pulley holder
Pulley puller
Parts used in the project include:
Aisin Timing Belt kit: part # TKT-021
Aisin Fan Pulley Bracket: part # FBT-002
Aisin Fan Clutch: part # FCT-018
Gates Accessory Belt Tensioner: part # 38488
Gates Accessory Belt Idler Pulley: part # 36026
Dayco upper radiator hose: #56469SJ
Dayco lower radiator hose: #16342MK
Toyota oil cooler hose: #15777-50060
Toyota oil cooler by-pass hose upper: #16281-0F010
Toyota oil cooler by-pass hose lower: #16282-0F010
Torque specs include:
34.5 Nm on the timing idler and bearing pulleys
18 Nm on the studs and 21 Nm on the bolts for the water pump
245 Nm or 181 ftlbs on the crank pulley bolt
16 Nm on the small bolts and 32 Nm on the large for the fan pulley bracket
16 Nm on the accessory belt tensioner
39 Nm on the accessory idler pulley
30 Nm on the fan clutch pulley bracket to the fan assembly
I have had a lot of questions in the comments about lining up marks on the pulleys and engine. Some timing belts have marks and some don't (the Aisin ones do have marks) and those marks can be used and can be helpful, but they can also be frustrating. I have responded as much as possible, but I found a great comment on Tundras.com from member Aerindel and I wanted to share his comment below:
"Those marks on the belt will only line up at one position, after you install the belt, it may take several dozens [many, many] of revolutions to get back to that same position.
But that doesn't matter. What matters is that your cams line up with their marks and the crank lines up with its marks. The marks on the belt itself are just to make sure you have the right tension between components.
Also remember, the crank and cams will not line up with every revolution, its a four cycle engine. It will take TWO revolutions of your crank shaft to make the cams rotate once, or in other words, every other full rotation of your cams, will result in your crank being 180º off.
The important thing is that everything lines up at top dead center [zero mark].
Also, as long as you can turn it over by hand without resistance, you aren't going to hurt anything by trying to turn it over. The danger with timing is that if its off enough that the pistons will hit the valves....but if you can crank it over a few times by hand without hitting anything, your good to go (timing may still be off but your not going to smash your valves)"
Again, very important, check your work by turning the crank by hand to make sure that no internal engine components are hitting.
Please give a like and subscribe if you found this video helpful.
Disclaimer:
The views expressed in this video are the opinions of the author who is not a professional mechanic. The owner and this channel do not assume any liability for injury or property damage incurred as a result of the information contained in this video. Use this information at your own risk! Please be safe when working on vehicles and using tools. No information in this video shall create any expressed or implied warranty, or guarantee of any particular result. Any injury, damage or loss that may result from the improper use of tools, equipment, or from the information contained in this video is the sole responsibility of the user and not this channel or its owner.