Published On Feb 17, 2024
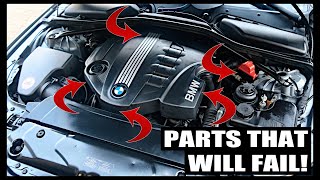
In today's video the customer's complaint is that there is a burning smell coming from inside the cabin of the interior of the vehicle. They also noted white smoke coming from the passenger's side area from under the hood. Upon closer inspection, it turns out that the valve cover gasket is leaking engine oil on to the exhaust manifold area causing the problem. This is a very common problem on a lot of BMW vehicles such as but not limited to the N52 and N55 engines. Due to the way how the engine is designed and is slanted downwards towards the passenger's side on an angle, gravity will push all of the hot oil on to that one side wearing out the valve cover and gasket a lot faster than on other vehicles. The use of plastics on today's modern day vehicles is also a contributing factor which is a failure point for these vehicles as well. Today, I will guide you into the step-by-step tutorial and process on how to remove and replace this. I will also show some key pointers and some tips and tricks in order to save you from headaches and problems down the road when I perform this repair.
To my viewers:
-------------------------
This video is a step-by-step tutorial with as much detail as possible in order to do this job successfully. This video is intended to help others. Please do not complain that this video is too long because it was designed as a tutorial for people who are having trouble doing this job. If needed please skip to the parts that you want/need to see and view for your reference.
Please keep the comments on this channel at a professional level as I do not want to have to ban people from this channel from inappropriate remarks and language. Thanks for watching and enjoy!
BMW Part Numbers:
----------------------------------
Valve Cover Assembly
11-12-7-570-292
Valvetronic Flange Gasket
11-37-7-502-022
2 x ASA self-tap screws (E6 screws/bolts)
11-36-7-609-963
TIMELINE:
------------------
00:00 - INTRO AND OVERVIEW
03:53 - REMOVAL
32:42 - QUICK TIP FOR REAR CORNER E10 TORX BOLT
35:21 - REMOVAL CONTINUED...
59:45 - INSTALLATION
1:42:47 - REINSTALL PLASTIC COWL COMPONENTS (TIMELAPSE)
1:44:23 - END DISCUSSION AND OUTRO
-------------------
If you would like to support my channel and help me post more content. Please donate here:
https://www.paypal.me/MooseMobile
OR
Please consider leaving a donation through YouTube's 'Super Thanks' if you think this video helped you and/or if you enjoyed this video.
If you like my content please SUBSCRIBE/LIKE/SHARE/COMMENT.
Please click on the bell notification if you want to be notified when I put out a new video.
------------------
Disclaimer:
Due to factors beyond the control of Moose Mobile Auto Repair, it will NOT be held liable for anything such as damages to your vehicle(s) or somebody else's vehicle, injuries and/or death incurred as a result of improper use of tools, equipment, improper procedures, negligence, etc.
Moose Mobile Auto Repair assumes no liability whatsoever and is NOT responsible for any problems/issues that may arise as a result of your own work on any automotive vehicles/machinery. These videos are solely for information purposes in which should be used as a guide and for reference only. The information herein provided are to be used AT YOUR OWN RISK and Moose Mobile Auto Repair is NOT responsible/accountable as a result of misuse of any information provided in these videos.