Published On Sep 3, 2017
Ep.5 BLOG + PRICE BREAKDOWN - http://www.jazmorton.com/van-conversi...
Follow our Instagram - / jaznlori
Season 1 Van Build : http://bit.ly/VanBuildS1
Season 2 Van Life : http://bit.ly/VanLifeS2
Van Build Blog : http://bit.ly/VanBuildBlog
Van Specs - http://bit.ly/van-specs
Van Build FAQ's - http://bit.ly/van-faqs
All My Van Build Materials : http://bit.ly/VanMaterials
Website - https://www.jazmorton.com
DONATE - https://www.jazmorton.com/donate/
▬▬▬▬▬▬▬▬▬▬▬▬▬▬▬▬▬▬▬
Vlogging Gear:
DJI Mavic Air 2 Drone - https://amzn.to/3sGRWGG
GoPro 9 Black - https://amzn.to/3rNT0Y9
Gopro El Grande Arm - https://amzn.to/3cFKUfH
Lowepro 450 Camera Bag - https://amzn.to/2KtG7ky
Hardware:
LaCie 4TB Rugged External HDD - http://amzn.to/2gmAZBj
Rode VideoMic Pro - https://amzn.to/321ZWGF
Smart Lav+ - http://amzn.to/2zaEWN9
▬▬▬▬▬▬▬▬▬▬▬▬▬▬▬▬▬▬▬
The wet area panel i used is called (High Pressure Melamine) - https://www.bunnings.com.au/wall-art-...
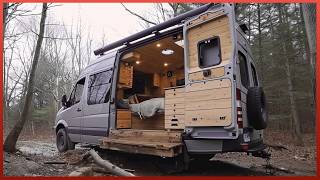
I started off by using string line from side to side to build the front wall, which divides the front cab from the back living area. Once I completed this I had a reference to go off to construct all the shower walls. I used a shower base and built my walls around that, allowing enough space for the internal bathroom sheets.
I used SikaFlex Pro as my adhesive to glue the wet area sheets to the timber framing, or marine ply. I also used Selleys Pro Wet Area silicone for all my edge seals. I chose 35mm x 70mm pine timber as it has a decent sized cavity for insulation + plumbing and electrical. Yes it is heavier than metal framing although I don’t think it adds too much weight given the amount I used.
I chose 65mm batten screws because they countersink into timber easily and at this length i can screw into the subfloor without going through the van metal floor. The wet area panels are 3mm “High Pressure Melamine Boards”, which are made for wet areas and showers.
They come in (1200mm x 2400mm) and (900mm x 1800mm) sheets, the larger sheet costs AUD$198 and the smaller AUD$139. I used 2 x large sheets and 2 x small sheets which increased the price quickly! I purchased them from Bunnings.
I used 4mm bracing ply to use as templates as I would rather make a mistake on a sheet that costs $26 as opposed to $198.
I don’t currently have an extraction fan installed in the shower although I will allow cables for this if I ever put one in later. I will be building the door in a future episode.
▬▬▬▬▬▬▬▬▬▬▬▬▬▬▬▬▬▬▬
MUSIC
Song 1 - Only - by Aurora Chillstep
Song 2 - Bygone - by Aurora Chillstep
Song 3 - oculus - by Hebona
Song 4 - i'll be waiting in the future - by Hebona
Song 5 - Solace - by Aurora Chillstep
Artist Socials
Aurora Chillstep
Soundcloud - / aurorachillstep
Facebook - https://exit.sc/?url=https%3A%2F%2Fww...
Youtube - / aurorachillstep
Twitter - / aurorachillstep
Hebona
Soundcloud - / hebona
Twitter - / hebonabeats
Tumblr - / thehebona
VSCO - http://vsco.co/hebona/images/1
#vanbuild #vanlife #travelwithjaz