Published On Aug 30, 2021
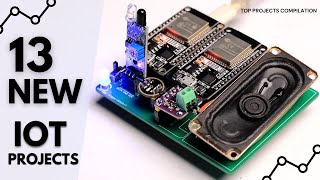
Build a 1kW 80V 35A WiFi MPPT Solar Charge Controller, equipped with phone app datalogging telemetry! The design has been intensively tested for months with a 8S 24V LiFePO4, 640W off-grid setup. The project is completely open source, Arduino ESP32 based and uses a diode free Synchronous Buck MPPT design. It works with all battery chemistries up to 50V (6V/12V/36V/48V) and solar panel setups with a Voc up to 80V (Imp: 30A). You can modify this for 150V solar setups, more on that on the written tutorial!
Your one-stop PCB prototype Partner PCBWay:
(https://www.pcbway.com/?from=TechBuil...)
UPDATED FULL WRITTEN TUTORIAL:
- https://www.instructables.com/DIY-1kW...
- More updates and details found from my written instructable tutorial.
- The MPPT can now support batteries up to 80V (12V/24V/36V/48V/60V/72V/80V), through a mod. Kindly visit 'step #38' of the Instructables tutorial link.
Synchronous buck based MPPTs are one of the most energy efficient designs. Premium commercial grade MPPTs use the same circuit topology. By replacing diodes that cause voltage drops in a buck converter (which results to additional power losses) with low on-resistance N-channel MOSFETs, power losses are decreased significantly. For years, the DIY community has made several attempts on building a True SyncBuck MPPT but is often met with fatal problems. Other got it to work but somehow cheated by still adding diodes, which results to significant losses. So I went on a journey and collaborated with Open Green Energy and countless co-leagues to deliver a good SyncBuck MPPT design for open-sourcing, which lead me to make this 4-part video tutorial.
DEFAULT SPECS:
- MPPT Perturbed Algorithm With CC-CV
- 80V, 30A Input (Solar, Wind Turbines, PSU)
- 50V, 35A Output (Li-ion, LifePO4, Lead Acid & etc.)
- Has a programmable buck bench power supply mode
- 98% Peak Conversion Efficiency (Synchronous Buck)
- WiFi & Bluetooth Blynk Phone App Telemetry
- Charger/PSU Mode (can operate as a programmable buck converter)
- 16bit/12bit Precision ADC Measurements (ADS1115/ADS1015)
- Automatic ACS712-30A Current Sensor Calibration
- Battery & Input Disconnect Recovery Protection Protocol
- LCD Menu Interface (with settings & 4 display layouts)
- Flash Memory (non-volatile settings save function)
- Settable PWM Resolution (16bit-8bit)
- Settable PWM Switching Freq (1.2kHz - 312kHz)
________________
PCBWAY PCB LINKS:
1.) Main MPPT Board (https://bit.ly/3gGccE7)
2.) Button Breakout Board (https://bit.ly/3kuwHF6)
3.) 2 Pin Fan Breakout Board (https://bit.ly/3jsmWIn)
GOOGLE DRIVE: (Schematics, PCB, Parts List Links, Firmware)
https://drive.google.com/drive/folder...
GITHUB FUGU FIRMWARE (RELEASES):
https://github.com/AngeloCasi/FUGU-AR...
PARTS SOURCE:
- https://www.e-gizmo.net/oc/index.php (PH)
- https://www.shopee.com/ (S.E. - ASIA)
- https://lcsc.com/ (GLOBAL)
- https://aliexpress.com/ (GLOBAL)
- https://www.mouser.com/ (GLOBAL)
________________
Main Components:
- ESP32 WROOM32 MCU Module
- ADS1115/ADS1015 I2C ADC
- CSD19505 2.6mΩ N-ch MOSFETS (3x)
- ACS712-30A Current Sensor IC
- IR2104 MOSFET Driver
- B1212 DC-DC Isolated Converter
- XL7005A 80V 0.4A Buck Regulator (2x)
- CH340C USB TO UART IC
- 16X2 I2C Character LCD
- AMS1117-3.3 LDO Linear Regulator
- AMS1117-5.0 LDO Linear Regulator
- Refer to excel sheet for the other components
________________
VIDEO TIME STAMP:
00:00 - Intro
01:49 - Schematic Design Explanation
05:06 - Materials Needed
06:07 - PCB Assembly Process
08:29 - Making A Custom Toroidal Inductor
10:22 - MPPT Unit Assembly
12:20 - Arduino ESP32 Programming
13:01 - MPPT Blynk WiFi IoT Phone App
13:47 - MPPT LCD Interface
15:35 - Quick Bench Test
16:14 - MPPT Solar Setup Installation
16:49 - USB Serial Communication Observations
________________
DISCLAIMER:
- Under no circumstances is this a commercial certifiable design. Design cost cutting was done, I'd only consider this a hobby grade project.
- So far the project has only been tested on a 640W solar setup. I am in the process of acquiring equipment for doing further tests.
- Efficiency curve was tested from 0W - 270W using four Aneng AN8008 9999 count DMMs. This was done under power saving conditions without LCD, WiFi and Fan. Accuracy needs to be verified with Agilent DMM. A follow-up part 4 video will be dedicated to these tests. If you have access to proper DC power analyzer equipment, I am willing to fabricate and give away board samples of the project for testing.
- The project is limited with a maximum input current range of 30A. Regardless, the output would be limited to an absolute output current of 35A due to the MPPT's theoretical buck design.
POSSIBLE MODIFICATIONS:
- You can remove D4 to prevent the MPPT from operating during night (not recommended)
________________
#PCBway #Solar #Electronics #DIY