Published On Jan 12, 2022
Here we go. How to build a custom ergonomic split keyboard that is affordable, Bluetooth (for the split and the connection to host), can easily be changed in the future and is designed by you for your own specific hand shape and keyboard preferences. Buckle up!
Watch next:
My 16 Key Tiny Keyboard Layout Tour
• Has Your Keyboard Got Too Many Keys?
🪛Soldering Essentials!
Tooling up with these links helps me out at no extra cost to you. Thanks! 🙏
Heat Proof Mat:
Amazon UK: https://amzn.to/3nn8tiB
Amazon US: https://amzn.to/3nn8tiB
Soldering Iron Kit:
Amazon UK: https://amzn.to/3Frdw87
Amazon US: https://amzn.to/3ouxQ1o
Lead Free Solder 0.6 (for sockets and switches):
Amazon UK: https://amzn.to/3co1GyM
Amazon US: https://amzn.to/2YSfZZs
Lead Free Solder 0.3 (for smaller work):
Amazon UK: https://amzn.to/30A2Yog
Amazon US: https://amzn.to/3HDDU0q
Flux Pen:
Amazon UK: https://amzn.to/3IemWVP
Amazon US: https://amzn.to/3Ko9lNm
📺 Three things to note as you watch the video:
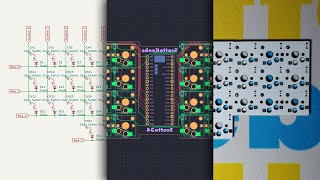
1. There was so much to fit in this video that I had to be pretty ruthless with avoiding getting bogged down in small details. You will need to spend some time reading the documentation for Ergogen to fill in the gaps.
2. I mentioned battery connectors in the video. I have added the footprints for these to my fork of Ergogen and set them up in the latest config files (also in my repo) but I have yet to order a PCB that uses them. As such the boards you see in the video have the battery soldered directly to the board. I have a doubt as to whether the placement of my connectors on my boards will even allow the battery and connector to fit so please don’t just have my boards built without checking this is being prepared to just solder the battery directly.
3. I glossed over the soldering in this video as I wanted to keep the scope fairly broad and wanted to leave time for looking at the shields, KiCad etc. When soldering the small switches I found I needed to drop the soldering iron temperature to stop burning the pads off the board. The technique for these surface mount parts is basically the same as I show in the video for the hotswap sockets: add solder to the pads, let it cool, then place the part on top of the solder and push the foot down onto it with the iron.
‼️ Most important bit of all. When making these flippable boards the controller goes opposite on one side to the other.
🚑 If you have any questions on anything either included or not included in the video please add a comment below and I will try and help.
🖥 Software:
Ergopad https://pashutk.ru/ergopad/
Ergogen https://ergogen.xyz/
KiCad https://www.kicad.org/
Info on KiCad plugins:
Rounding Tracks: https://github.com/mitxela/kicad-roun...
Teardrops plugin: https://github.com/NilujePerchut/kica...
Additional reading on these plugins: https://mitxela.com/projects/melting_...
🍻 The best place for help learning this process is the Ergogen Discord. That place is a ball!
🛠 Basic parts list:
PCB (I ordered mine from https://jlcpcb.com )
Kailh Choc switches (I used the light blue liner ones from https://splitkb.com/products/kailh-lo...
MBK Blank Keycaps https://splitkb.com/products/blank-mb...
Hotswap Sockets (Choc) https://splitkb.com/products/kailh-ho...
Socket pins (pins only) https://splitkb.com/products/mill-max...
Full height machine pin sockets https://mechboards.co.uk/products/mac...
Better version of reset button (matches the footprint better but more expensive) https://www.aliexpress.com/item/10050...
Battery connector (2p curved) https://www.aliexpress.com/item/10050... (Uses the bat footprint in my Ergogen fork)
Power switch https://www.aliexpress.com/item/40006... (Uses the pcm12 footprint in my Ergogen fork)
Nice!nano v2 https://splitkb.com/products/nice-nano or https://mechboards.co.uk/products/nic...
Batteries: https://www.ebay.co.uk/itm/194001009975
👩💻GitHub Repos
My Ergogen fork: https://github.com/benvallack/ergogen
This contains the following two config files for The Card and The Flipper along with the footprint dependencies.
The Card
https://github.com/benvallack/ergogen...
The Flipper
https://github.com/benvallack/ergogen...
ZMK GitHub Actions shield and keymap for The Flipper
https://github.com/benvallack/zmk-con...
ZMK GitHub Actions shield and keymap for The Card (revisions after this have pins in the wrong place because I messed up some soldering)
https://github.com/benvallack/zmk-con...
Contents:
0:00 Titles
0:14 Introduction
2:07 Ergopad
3:14 Ergogen
3:36 KiCad
4:28 Ergogen walkthrough
9:00 KiCad routing walkthrough
14:33 Soldering introduction
15:41 Creating a shield in ZMK
19:29 The Flipper, The Card, what next?