Published On Apr 18, 2015
In the past I've tended to make transparencies from my PCB design package using a laser printer and a sheet of tracing paper. This doesn't work so well with the modern fast laser printers, since they use a very thin layer of toner.
I had been using a very old Canon Pixma IP4000 inkjet printer to make transparencies due to its ability to allow multiple passes of the same piece of paper with quite staggering accuracy. But alas, all good things come to an end, and one day the Canon decided to smoke its printhead. The loss of that printer was made worse by the fact it had unchipped ink cartridges that were very easy to refill, were translucent so you could see the actual ink level as you filled them and had an optical ink level detector that reliably informed you when the cartridge was actually running low. You could also physically unclip the print head and wash it for easy maintenance. Truly an engineers printer.
But now I've unwillingly ended up with two EPSON printers that are the complete opposite. Chipped cartridges that contain very little ink, a hard to clean printhead and an appallingly inaccurate paper feed system that does not allow multiple passes.
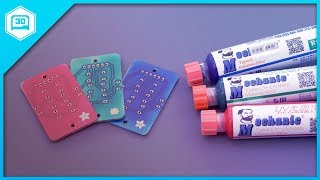
So this video is about forcing the lacklustre EPSON to produce acceptable black images on transparency film. The tests include non OEM dye ink and non OEM pigment ink in non OEM cartridges with utter contempt for EPSON's desire to sell very small portions of ink at prices that rival the cost of gold by weight.
There are various inks available for inkjet printers in the aftermarket. You can buy cheap and nasty dye inks that fade quickly, or better dye inks that have UV inhibitors to make the image last longer, or pigment based dyes that have a fine suspension of coloured particles to create a very solid image with good aging properties. There are also other specialist inks like dye sublimation inks for printing T-shirts and other stuff.
I did this test with generic dye ink that does fade quickly in sunshine, plus a much better pigment based ink. One day I'll probably try the test with a modern UV inhibiting ink too, but changing inks in a printer from one type to another is always a bit of a chore, especially in fixed head printers like the EPSONs.
I also did some toner tests too, but they were not under ideal conditions.
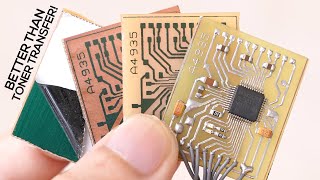
I tried various inkjet transparency films from ebay. The most expensive was the worst and the cheapest generic inkjet and laser compatible film was the best....
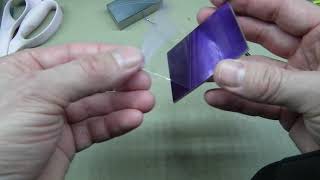
For the UV exposure I didn't use my normal lab-grade Mega Electronics tubes-in-lid A3 exposure system, but instead used a generic ebay nail varnish curing light with four UV tubes and a timer. This was just to see if it is usable as a home UV exposure unit.
The developing chemical I used was sodium metasilicate mixed in a ratio of 12g in 250ml of water. (roughly 1 to 20 ratio)
You can also cautiously use sodium hydroxide otherwise known as lye, caustic soda or drain cleaner if you want to see the etch resist disappear almost instantly (including the tracks) in a swirl of disappointment, leaving you with a shiny piece of blank copper laminate. But the sodium metasilicate is much easier to use, provides more consistent results and can be stored and reused until it is fully depleted. Sodium Metasilicate (water glass) is available from ebay.
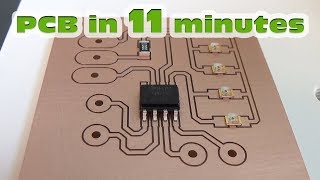
To etch the PCBs I used standard ferric chloride etching solution in the extremely clean and convenient Seno GS etching system where the highly corrosive and staining chemical is always kept sealed in a bag during etching and washing of the PCBs. I do have a tri-tank PCB etching station, but for small quantities of PCBs the Seno bag system is extremely convenient.
The results so far? Pigment ink is the clear winner, but dye based ink is still a viable option.