Published On Dec 11, 2018
Click for more info and reviews of this Dexter Trailer Brakes:
https://www.etrailer.com/Accessories-...
Check out some similar Trailer Brakes options:
https://www.etrailer.com/dept-pg-Acce...
Click for more info and reviews of this Dexter Trailer Brakes:
https://www.etrailer.com/Trailer-Brak...
Check out some similar Trailer Brakes options:
https://www.etrailer.com/dept-pg-Trai...
Click for more info and reviews of this Dexter Trailer Brakes:
https://www.etrailer.com/Accessories-...
Check out some similar Trailer Brakes options:
https://www.etrailer.com/dept-pg-Acce...
https://www.etrailer.com
Don’t forget to subscribe!
/ etrailertv
Full transcript: https://www.etrailer.com/tv-install-d...
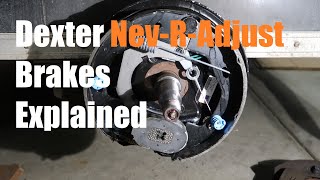
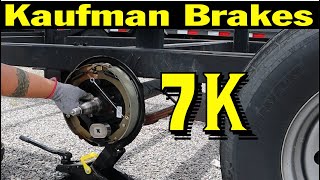
Speaker 1: Today we're going to be taking a look at the 10 inch Dexter Never Adjust electric trailer brake kit, for 3,500 pound axle, for the left and right hand side. It's going to be part number 23-468-469. It's also available individually for the left hand side using part number 23-468, and the right hand side, using part number 23-469. So here's what our brakes are going to look like once we have them installed. Now these are going to be a 10 inch diameter brake and be about 2-1/4 inches deep.Now one of the nicest things about these brakes is the fact that we're not going to have to adjust them, maybe the initial adjustment up front, but after that, they're going to be self adjusting. So wherever the brakes start wearing down, they're going to automatically adjust out, so they're at the right pressure.
And the fact that it's a whole assembly, it's going to be a lot easier than replacing each little spring or trying to just replace the shoes on your old assembly.The installation is going to be rather simple. We're going to take our old brakes off, or if we're adding new brakes, we're just going to push the brake assembly into place and we're going to have four nuts that we're going to put on the back of the studs. And then we'll just have two wires to hook up. Now our brake assembly is going to come as a kit. We're going to have the left and the right hand side.
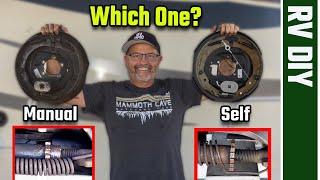
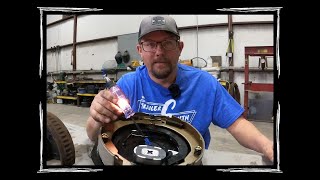
They're going to come with all the mounting hardware as well as the plugs to go in the back, so we can make our initial adjustments.Compared to some of the other self adjusting brakes like the etrailer self adjusting brake kit, they're going to be almost identical. But the main big difference between the two of them is going to be the brake pads themselves. The Dexter is here, you can see on the edge where it's not exactly super clean, that's because when they manufacture these, they score them and then snap them. Whereas with the etrailer brand, they're going to be a nice clean cut because they're fully cut, instead of scored and snapped.Now overtime, these can cause a little bit more wear on the edges because it's not a super clean cut there, but Dexter is a well known brand, and they do offer a quality product. If you're comparing these two manual adjustment brakes, these are definitely going to take it there because they're going to be much more user friendly, because they're going to acquire that much less maintenance.
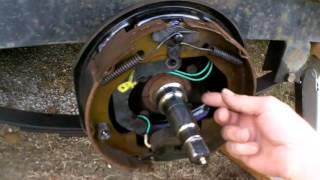
We're not going to have to crawl underneath our trailer, making adjustments every so often, because they're going to adjust themselves.So now that we've seen what our brakes look like and gone over some of the features, let's show you how to get them installed. To begin our installation, we went ahead and jacked our trailer up. Now we are using a jack, but we also have a jack stand underneath the frame towards the back, and we removed the wheel So now we're going to need to remove the dust cap. Take a screwdriver, go along the edge, just slowly work it out.Now, with the dust cap removed, we're going to go ahead and clean up some of this grease so we can see what we're working with, because we're going to need to pull the bearings out. And regardless if you have brakes or not, like we don't have here, we're still going to have to pull the hub off and pull all the bearings out as well.
Now if you have a cotter pin or a keeper tab, you're going to want to bend that out of the way, or pull the cotter pin out. That way we can get that castle nut to come off.Grab a pair of channel locks, and we'll remove that castle nut, so we can pull everything out. Once we have the nut removed, we'll go ahead and remove all the washers and the keepers. We'll clean them up and set them aside. Sometimes it helps if you just pull on the hub a little bit, and the rest of the washers and that bearing will come out. Now we're going to remove the hub. You're going to want to clean off the spindle extremely well. Get all that old grease and the other kind