Published On Feb 27, 2023
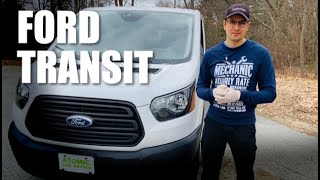
Ford Transit Van Rust Holes [MOT FAIL!] Welding Repair Guide For UK 2.2 FWD Van | 14
Here are a couple of the things we used during this work:
Waxoyl underseal: https://ebay.us/EYxOAm
Welding Wire: https://ebay.us/ZKT33z
Clarke Weld MIG 150 TE Turbo: https://ebay.us/jbdfE8 (this is the newer version)
Argon/CO2 Welding Gas & Regulator: https://ebay.us/7BOngD
Angle Grinder Wire Brushes: https://ebay.us/sSJjtM
Safety Goggles: https://ebay.us/2Dvt5C
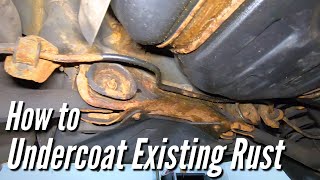
Every year in the UK vehicles have to go through a government test to ensure that road safety is maintained. It checks things like the steering, suspension, brakes and structural integrity of the vehicle. Also in the UK we put a lot of salt on the roads in the Winter so vehicles do tend to rust a lot. So this year when our Transit went in for its MOT it failed. It being an older vehicle, a teenager now, I expected something to come up. Wear in the steering, suspension faults, brake wear, all of these things were in my mind. I was a little surprised when it failed and listed things implying major problems with structural integrity. At first I thought, “ OH no, the van is dead and on its way to the scrap yard”. But then I realised that I have been under the van and it certainly isn’t falling apart. So I go the MOT inspector to walk me through the areas of concern. It soon became obvious that although the rust holes were quite bad, they certainly weren’t terminal. The transit has two very hefty chassis rails that the suspension is connected to, the rust that was picked up wouldn’t cause a problem with them for some time.
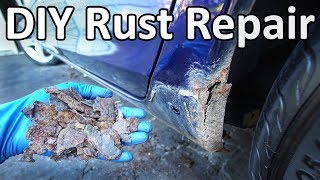
The most important thing was to cut the metal back to where the rust was only on the surface. This meant that most of the holes became a lot bigger when they were cut out. We did put some rust treatment inside the areas where the rust was before welding new plates in, but it will still need some more effort when the weather gets better to ensure that the rust doesn’t become a bigger problem in the future.
Although not overly difficult it did take a couple of days or more overall. We were very lucky that the weather was “reasonable”. We didn’t have anywhere to work inside, so it had to be done on the drive. If it had rained, or snowed, we wouldn’t have been able to do the job until another time. There was a time limit on us, because if a vehicle fails the test you can have the parts it failed on retested within 10 working days for free, otherwise it is a full new test at full price. We wanted to get in within the time period, so there was a bit of a push to get it done.
There was also a bulb out for the test. I am sure it was working the day before when we checked them, we aren’t totally stupid. This was easy to replace. There were also a few advisories, these are things that the inspector notes, but are not bad enough for it to fail the test. A couple of tyres need replacing, we aren’t sure if we are going to change the wheels, so we need to decide on that before we buy tyres. There was also the frequent brake lines covered with grease, comment. I will look at cleaning them and painting them with a rust-inhibiting paint when I give the underside some more attention.
Overall it wasn’t too bad. When I took it for the retest they were very happy with the repairs we had done. I really must give it some attention this Summer, or we will be doing it again with some new holes next year 🙂
For more helpful how-to guides and restoration project logs, visit our blog: https://www.spannerrash.com/
As an Amazon Associate, Ebay Partner and Awin Affiliate, we earn a small commission from qualifying purchases. Some of our links are affiliate links, and if you decide to purchase things through them, we earn a small commission. It costs you nothing but helps us to keep the content coming. Thanks for your support!