Published On Mar 22, 2019
Check Out Our FREE GUIDE: 25 Must-Have Carpentry Tools...Under $25 Each!
https://www.thehonestcarpenter.com/
Affiliate Tool Links For This Video:
Dewalt Hole Saw Bits:
https://amzn.to/2O2j5EQ
Black&Decker Jigsaw (Great Price/Reviews!):
https://amzn.to/3sVv7id
Dewalt 20 V Jigsaw NO BATTERY:
https://amzn.to/3kTTdqQ
Wen 18 ga Brad Nailer + Nails (Amazing Price!):
https://amzn.to/3uVSxpl
Porter Cable 18 ga Brad Nailer BATTERY-POWERED:
https://amzn.to/3uW1AXy
Dewalt 12 in. Miter Saw (single bevel compound):
https://amzn.to/3ritE55
(These are affiliate links. When you shop through these links, we receive a small commission at NO EXTRA CHARGE TO YOU. We greatly appreciate the support!)
FOLLOW US ON INSTAGRAM:
/ thehonestcarpenter
FOLLOW US ON LINKEDIN:
/ thehonestcarpenter
Check out our other ROT-RELATED VIDEOS linked below!
Repair Rotted Trim (Skirtboard):
• Repair Trim Rot (Skirt Board and Corn...
Repair Rotted Door Jambs:
• How To Repair Rotted Door Jambs
Fix Rotted Brickmold:
• Fix Rotted Door Frame (Brickmold)
Replace Deck Handrails:
• How To Replace Deck Handrails (Easy T...
Fix Rotted Basement Stairs:
• Fix Rotted Basement Stairs
Repair Leaning Fences:
• How To Repair Leaning Fences
Replace Deck Boards:
• How To Replace Deck Boards
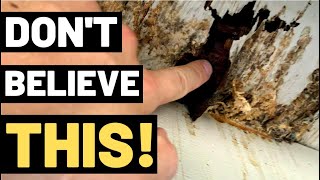
Sink Cabinet floors are prone to rot, especially since manufacturing companies make them out of porous particle board. This video from The Honest Carpenter will show you how to build a new sturdy floor over the rotted floor in your sink cabinet!
Tools:
Table saw
Miter saw
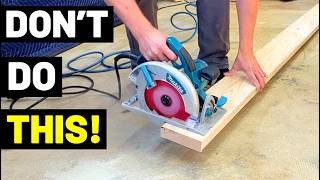
Jigsaw
Hole saw bits
Tape measure
Brad nailer
Compressor
Materials:
1/2" plywood
Brad nails
Liquid Nails
For a detailed article about this repair, check out the link below!
https://thehonestcarpenter.com/blog/s...
How-To:
1) MAKE SURE THE PLUMBING IN THE SINK CABINET IS NO LONGER LEAKING!
2) Measure the interior of the sink cabinet
3) Cut a 1/2" plywood piece to the interior cabinet measurements
4) Cut new piece in half
5) Work halves into cabinet, mark locations of plumbing pipes
6) Notch out pipe locations using hole saw bits and a jigsaw
7) Work one board into place around plumbing pipes
8) Cut 1/8" scrap piece. Glue and shoot it into place on underside of first board.
9) Spread Liquid Nails onto open face of 1/8" ply piece. Lay second board onto this glue patch and shoot into place
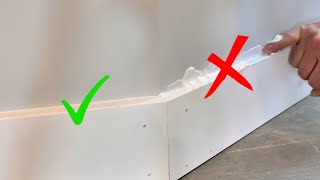
10) Trim front plywood edge with custom pine trim, glue and brad nails
11) Paint new cabinet floor with exterior grade paint.
Visit us at The Honest Carpenter website!
https://thehonestcarpenter.com/
(Raleigh, Durham, Cary, Apex, Wake Forest--North Carolina)