Published On Dec 19, 2023
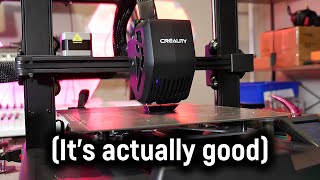
A faulty microswitch stopped my brand new ender 3d printer from working properly. I could have got a new switch, but the fix was quick and easy. The z axis was not auto homing, and it turned out to be a faulty microswitch board.
"Homing failed" on a Creality Ender 3 3D printer typically indicates a problem with the printer's homing or endstop sensors. Here are steps to check and potentially fix this issue:
1. *Check Physical Connections:*
- Ensure all cables and connections are securely plugged into their respective ports on the control board and the endstops.
- Look for any loose wires or damaged connectors.
2. *Verify Endstop Functionality:*
- Manually trigger each of the three endstops (X, Y, and Z) to see if they register correctly. You can do this by gently pressing the endstop switches with your finger while observing the printer's LCD screen. The corresponding axis should register as triggered.
- If an endstop doesn't register, it may be faulty and needs replacement.
3. *Check Endstop Wiring:*
- Follow the wires from the endstops to the control board. Make sure they are connected to the correct pins (X, Y, Z) on the board.
- Inspect the wiring for any visible damage or loose connections. Replace any damaged wires or connectors.
4. *Adjust Endstop Switches:*
- Sometimes, the endstop switches may need slight adjustments. You can manually move the print head or bed to the home position and gently adjust the position of the endstop switch until it triggers correctly.
- Make sure the switch is being pressed firmly but not excessively so. It should be triggered without too much force.
5. *Check for Obstructions:*
- Ensure there are no physical obstructions preventing the printer's movements. Check for any objects or loose cables that might be blocking the print head or bed from reaching the endstops.
6. *Firmware Configuration:*
- Check your printer's firmware settings to ensure that they are correctly configured for your specific printer model. If you've recently updated your firmware or made changes to the configuration, there might be an issue in the settings.
- If needed, you may need to re-flash the firmware with the correct settings.
7. *Re-Level the Bed (if Z homing fails):*
- If you're encountering a "Z homing failed" error specifically, ensure that your printer's bed is properly leveled. An uneven bed can cause issues during the homing process.
8. *Inspect the Homing Sequence:*
- Watch the printer's homing sequence closely to see if you can identify where the issue is occurring. It might help pinpoint the problem.
9. *Contact Customer Support:*
- If none of the above steps resolve the issue, consider reaching out to Creality customer support or seeking assistance from a knowledgeable community or forum. There may be a more specific issue that requires advanced troubleshooting.
Always exercise caution when working with your 3D printer and its components. If you're unsure about any step or need additional assistance, consult your printer's manual or seek help from experienced users or professionals in the 3D printing community.
एक दोषपूर्ण माइक्रोस्विच ने मेरे बिल्कुल नए एंडर 3डी प्रिंटर को ठीक से काम करने से रोक दिया। मुझे एक नया स्विच मिल सकता था, लेकिन फिक्स त्वरित और आसान था। Z अक्ष ऑटो होमिंग नहीं था, और यह एक दोषपूर्ण माइक्रोस्विच बोर्ड निकला।
Un microinterruptor defectuoso impidió que mi nueva impresora Ender 3D funcionara correctamente. Podría haber conseguido un nuevo interruptor, pero la solución fue rápida y fácil. El eje z no estaba en posición inicial automática y resultó ser una placa de microinterruptor defectuosa.
一个有故障的微动开关使我全新的 ender 3d 打印机无法正常工作。 我本可以换个新开关,但修复起来又快又容易。 z 轴没有自动归位,结果证明是一个有故障的微动开关板。