Published On Feb 15, 2022
Hi everyone!
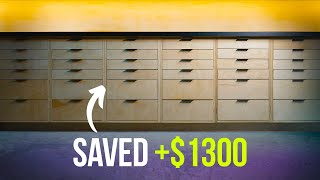
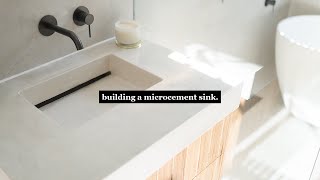
in this video I show you how you can give a wooden sheet a concrete look. This goes under the name of polished concrete, beton ciré or mortex as a brand name. I'll take you through the steps of making this floating desk.
Mortex is a brand name known in belgium, you can find more information on following link https://bealinternational.com/en/
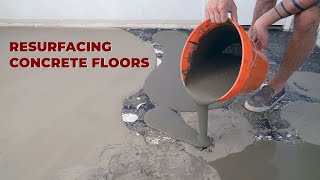
The technique on it's own is pretty well known. You can apply it to floors, walls, kitchentops, pools, furniture and more to give it a concrete look, without having it to fully pour it with concrete.
Disclaimer: Everything mentioned in this video are my own thoughts and how I've personally made it. If you want to attempt to do something similar, do some testing first, contact a specials or get more detailed information.
Make sure to go through the TDS (technical date sheet for correct information) https://bealinternational.com/en/tech...
The system I've used is by following following steps.
1. Use a primer: Residur or Resipact G. Both will make a barrier between your material you want to cover and the Mortex coming on top. I've used the Resipact G. It's a 1K component you can apply to your surface, it will create a nice bonding surface (primer) to witch you can apply your polished concrete mixture. I've applied it by roller. It will leave a textured finish to which it will bond well.
2. Use a first layer of polished concrete mixture (in my case Mortex Color F2)
you mix Mortex Color F2 with some Bealcryl 2. General rule is the lowe the F value the lower the amount of Bealcryl needed. In general you could say that for 5kg of Bealcryl you'll need 25kg of Mortex Color F-value)
You can add color and additives to this mixture to change it properties an characteristics like flow and potlife, meaning working time.
3. After adding the first layer you just need to do a quick rub with some sanding paper to remover high spots, debrees, and sharp edges. In, my case I Then proceeded using the mortex color F4. This has a smoother finish and texture. By adding this on top of the first layer, you'll fill the gaps made with the F2. Once you've sanded this back you'll see some color difference and a nice texture being created by the design of the 2 layers.
4. To finish my floating desk I've sanded the part with a 150P grit and added some Bipur Matte clear on top by using a roller. The first layer will get sucked down pretty hard, as the following layers will create the nice and even finish. Make sure to respect the drying times inbetween the layers for best results.
5. Using some aluminium T-slot profiles I created the support to mount to the walls. Profiles come from www.aluxprofiel.nl
In case you want to know more about that check out my following videos:
• 3D Printer Enclosure Build - Creality... (3d printing enclosure)
• Aluminium T-slot profile workshop Table (rolling working table)
For more of my projects make sure to follow me on:
Facebook: / mat2composites
Instagram: matthieu.libeert
twitter: @matthieutje65
web: https://www.mat2composites.com
#Mortex #concrete #howto