Published On Aug 16, 2022
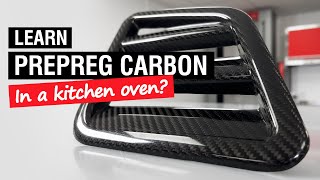
Hi, In this video I take you through the steps of how to make a HONDA motorcycle front disk brake guard/cover out of carbon fiber and Epoxy Resin using the Resin Infusion VARTM technique.
First step:
Getting everything ready to make the mould. I've started with an original part made out of PP, to make a good mould we'll need some flanges around the part. I've used some corrugated plastic flute board to close any gaps and create a flange. It's important to take good care here to make sure we have no undercut (meaning you couldn't remove the part due to geometry locking)
It's very important to close any gaps or bolt holes at this stage to make sure we can make a good mould. For the transition of the part to the flange I use some filleting wax and round them over with a ball end tool. Once the preparations are done we can proceed with the release film or coat. In my case I use the Chemical Easy Lease agent from @easycompositestv
Second step:
Making the mould at this point. I use the Uni-mould tooling system from Easy Composites here. It's a system where you have to go through 3 stages.
First stage is the Tooling Gelcoat (black layer) It is mixed with some MEKP catalyst to ensure a good curing 1-2% needs to be used here and mixed with the gelcoat. After around 8 hours the gelcoat should have cured enough for the next step. After the gelcoat stage we proceed with the coupling coat. The Coupling coat will ensure a good bond between the gelcoat and tooling resin. This time we also mix it with 1-2% MEKP catalyst. To create a stronger layer of the coupling coat, some layers of 100g Chopped strands fiberglass is used and applied in small patches all over the part. The final coat is the tooling resin, the tooling resin is a bit thicker and will create the strength of your mould. The resin is being applied with 4x layers of 400g chopped strand fiberglass pieces. After this is done you are done with the mould stage and can let it cure for preferably over 24h, the longer the better.
Third step:
Once the mould has fully cured, the sharp fiberglass edges are trimmed to size using an angular grinder. Make sure to wear proper personal protection with a dustmask. After that the mould can be sanded and polished if needed. Then 5 coats of Chemical Easy Lease agent is used again.
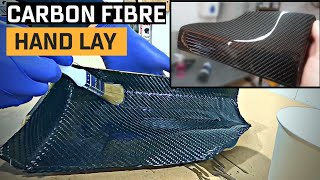
Now we are ready to put the dry carbon fiber layers into the mould. I'm using a 200g 3K Twill weave Carbon Fiber here. Try to be careful to make sure there is no bridging (parts where the carbon fiber cloth isn't fully in contact with the mould. This would create air pockets. Using the fusion FX spray tack I apply 2 more layers of carbonfiber to create a thickness of 0.6mm in total.
Normally we would then proceed with the peelply. But I tried something different here by just using a perforated film inbetween the carbonfiber and the infusion mesh. This saves me some time and material. The only downside is that the back of the part will have a less good finish than with peelply but in this case I didn't matter that much.
Now it's time for the vacuum bag with tack tape and infusion mesh followed by the resin lines and vacuum lines. while bagging the part some pleats are added to make sure the bag will conform nicely over the part and create an even pressure. Once full vacuum is reached (meaning we have zero leakage of pressure we can start mixing the resin.
I'm using the IN2 Epoxy resin from Easy Composites. This is a resin type that is thinner than a regular laminating epoxy. This helps with the resin flowing nice and quickly through the part.
After the VARTM resin infusion is done we can let the part cure.
Fourth step:
After curing for 48 hours the bag is removed and the infusion mesh. The part is demoulded and can be trimmed by using a dremel and my permagrit tools to create the good geometry of the part again. The holes can be drilled using a regular dril on low speed. After drilling the holes can be fine tuned by using some files. Some sanding is advised prior clear coating the part.
Main materials used:
https://www.easycomposites.eu/uni-mou...
https://www.easycomposites.eu/in2-epo...
For more of my projects make sure to follow me on:
Facebook: / mat2composites
Instagram: matthieu.libeert
twitter: @matthieutje65
web: https://www.mat2composites.com
#Carbon #motorcycle #epoxy