Published On May 9, 2019
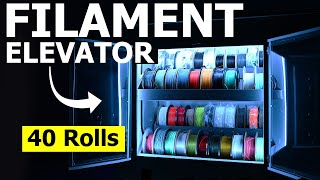
We needed a better filament storage solution that could regulate the temperature and humidity inside the cabinet, so we built one that can hold 12 rolls! I also tried my hand at etching a glass door. Check it out!
GET PLANS FOR THIS PROJECT
https://iliketomakestuff.com/product/...
VINYL CUTTERS // BITS
• Vinyl Cutters // Bits | I Like To Mak...
TOOLS & SUPPLIES WE USED(affiliate links):
https://kit.co/iliketomakestuff/filam...
https://kit.co/iliketomakestuff/my-wo...
https://kit.co/iliketomakestuff/shop-...
MUSIC: http://share.epidemicsound.com/iltms
This filament cabinet was designed to hold a lot of filament. There are commercially available filament boxes but they either weren't temperature or humidity controlled or they didn't hold enough filament. So we started from scratch and Josh mocked one up in Fusion 360. Our goal was to keep the entire cabinet under a half sheet of plywood.
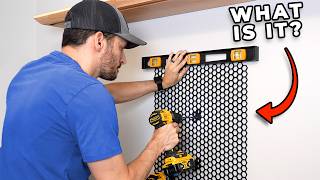
I took the cut list and used the table saw to make quick work of the plywood. To secure the shelf to the side panels, I cut a 1/4" dado in the two sides. Using wood glue and brad nails, I assembled the cabinet together. To hang the cabinet on the wall, I cut keyholes in the back using a special bit for my router. This keyhole bit plunges into the wood and carves a groove so you can hang the whole thing on the wall with some screws.
For the door frame, I decided to cut half-lap joints for additional strength. With this rectangular frame, I needed to cut in the rabbet for the glass door panel to sit in. I took my rabbeting bit and ran it on the inside of the frame, making a 1/4" ledge for the glass. To hold the panel in place once it's done, I used a point driver. This staple-gun-like tool adds points, the little rectangular tabs that you see in the back of picture frames.
We wanted the door to hinge upward so that you could get to the filament easily. We used full-overlap, soft close hinges and some gas struts to help hold the door in its open position. In the video we didn't add the struts because we cut the frame wrong, the plans have been updated to fix this. I used a concealed hinge jig to install the hinges on the door frame and then screwed them into the top of the cabinet.
We wanted the door to have a cool design so I asked our graphic designer Forby to make a variation of the ILTMS "M" logo that could look cool on the door. I cut this design out on the vinyl cutter and applied it to the cut piece of glass. This mask would keep the glass clear while the unmasked portions would be chemically etched using a special solution.
I painted on the glass etching solution and let it sit for about 10 minutes. To wash off the solution, I went outside and used a garden hose to clean off the surface. What was left was the etched surface and the vinyl masks. Once all of the masking was removed, it looked really cool. The mixture of clear and etched glass was really interesting and could be masked to make all sorts of designs. I dried the door and installed it in the cabinet frame with the point driver.
Because certain types of 3d printing filament are hydroscopic, or the absorb water from the air, they should kept in an area that controls both the temperature and the relative humidity. In order to make our cabinet do both, Josh found a heating rod meant for gun safes that raises the temperature in a space and forces out the wet air. I mounted the rod inside the cabinet and drilled some holes on the side to act as vents. To monitor the conditions inside the cabinet, we also added an inexpensive temperature and humidity sensor.
Now that the cabinet is set for filament storage, we hand the thought that the filament could be drawn from inside the cabinet while printing. Josh modeled up some simple spool holders using skateboard bearings and we drilled a hole under the spool location. We placed one of our printers under the hung cabinet and were able to easily print directly from the closed cabinet!
Because this cabinet is going above my electronics station I wanted it to hang my tool underneath. I transferred my magnetic tool holders to the cabinet's underside and mounted a power strip to the side. With these additional pieces added, the filament cabinet was completed.
Subscribe: http://bit.ly/ILikeToMakestuffSubscribe
Check out my TopVideos!: http://bit.ly/ILikeToMakeStuffTopVideos
Learn 3d modeling, get digital plans, and cool merch at
https://iliketomakestuff.com
Want to support ILTMS? Get exclusive content and more...
http://www.iliketomakestuff.com/patreon
FOLLOW:
/ iliketomakestuff
/ iliketomakestuff
/ iltms
#ILikeToMakeStuff
Making Filament Storage with an Etched Glass Door // 3d Printing & Woodworking
• Making Filament Storage with an Etche...
I Like To Make Stuff
/ iliketomakestuff