Published On May 28, 2022
So far I have come across many microcontroller based scrolling text projects that display different information, but I think this is the most detailed and practical Led Matrix Scroller.
Basic features include:
- Accurate Clock refresh via Internet Time Servers
- Local Weather and conditions (refreshed every 10 - 30 minutes)
- News Headlines from all the major sources
- Display Bitcoin current value
- Display 3D print progress from your OctoPrint Server
- and display Pi-hole status and graph
Once connected to your local Wi-Fi network, from any PC or phone, you can control many options through a great web interface such as:
- Text scroll speed
- Scrolling frequency
- Led brightness
- Configurable number of LED panels
- Options of different types of Clock Displays
- Update firmware
- as well as enabling or disabling of any of the previously mentioned faeatures.
The device is extremely simple to make and contains only three components:
- ESP8266 based microcontroller board
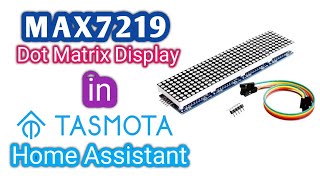
- 8x32 MAX7219 Dot Matrix Module
- and small piezo buzzer
The other part is a beautiful 3D Printed box, for which the STL files are downloaded from Thingiverse (https://www.thingiverse.com/thing:438...) and slightly modified. Also the dot matrix module was modified as explained later in the video because the original 8x8 segments were separated from each other.
When we turn on the device, the start sound is heard first, and then the message hello appears. The following is the version of the recorded firmware and the local address that the microcontroller receives. Later through this address we enter the web interface through which we control all the options. The data is then uploaded online and displayed in order. Finally the correct time appears. Timing between data scrolling and data refresh time is set via the web interface.
To start the web interface, In the browser we need to enter the address that was displayed on the device at startup. In my case it was 192.168.100.179. On the left side is a menu with all the options. The most important is the configurе option where is entered the all basic data.
Let me just mention that in reality the text and the numbers look fantastic, but it can not be captured in the video due to the lower quality of the camera (it is very difficult to clearly capture the light from the LEDs).
Detailed description, schematic, 3D parts, and code at:
https://www.hackster.io/mircemk/esp82...
If you like my job buy me a coffee: https://ko-fi.com/mircemk
If you're interested, you can check out my playlist of unusual clocks at the link:
• My collection of unusual clocks
Visit my Youtube Channel for more Projects , DIY and How To Make videos:
/ mirkopavleskimk
by mircemk
SUBSCRIBE LIKE AND SHARE !!!!
Thanks for your Support !