Published On Jun 16, 2021
Find the Perfect Exposure for Resin 3D Printing With UVTools!
In this video, I'll show you how to find the perfect resin exposure using an amazing program called UVTools!
In the past trying to find the best exposure settings for any resin on your 3D printer was a long and frustrating process. You needed to print multiple resin Validation Matrix tests one after another and then compare the results.
Now with the Exposure Time Finder function in UVTools, you can find the perfect resin exposure setting for almost any resin in about 90 minutes!
Use the link below to download UVTools and follow along with the video to create an Exposure Time Finder for your printer!
I want to thank Tiago Conceição for creating and constantly updating UVTools with so many great features.
I'd also like to thank Khalil Nurullah and Vinicius Silva for helping me learn how to use UVTools so that I could make the best tutorial video for this feature.
#sliceprintroleplay #UVTools #resin3dprinting #3dprinting
----------------------------------------------------------
Chapters
0:25 Start of tutorial
0:47 Compatible printer list
1:04 What is UVTools
1:20 How to create an Exposure Time Finder test
7:21 How to save an Exposure Time Finder test on your USB drive.
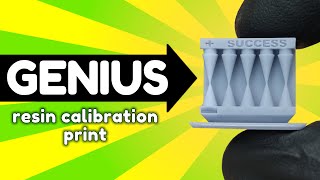
8:08 How to read the Exposure Time Finder test results
12:01 How to check if your printer is compatible with the Exposure Time Finder test
13:05 Thank you
----------------------------------------------------------
Download UVTools Here:
https://github.com/sn4k3/UVtools/rele...
Find the Printer compatibility list here:
https://github.com/sn4k3/UVtools/wiki...
----------------------------------------------------------
*Attention*
If you don't see the "Multiple Exposures." window when using the Exposure Time Finder function.
Please slice a new file for your model of printer using Chitubox. Then use that file to begin this process.
There have been some issues with older pre-sliced tests and some files sliced with Lychee .
General guideline for creating your test
Layer Height:
I print at 0.05 because I get great detail with a shorter print time than with thinner layer heights.
Remember that smaller layers = more layers which = longer print time.
Same for both Mono and RGB screen printers.
Bottom Layer count:
I recommend 4 bottom layers on most prints, but I do use 5 on larger prints.
Same for both Mono and RGB screen printers.
Bottom Layer Exposure time:
For Mono screen printers I use 20s - 30s.
For RGB screen printers I use 45s - 55s.
Positive Pins and Negative Holes:
This setting can be used on both mono and RGB screen printers.
Custom Text:
This setting can be used on both mono and RGB screen printers.
Normal Step Increments:
For Mono screen printers use increments of 0.25s, 0.5s, or 0.75s.
For RGB screen printers use increments of 0.5s, 1s, or 1.5s.
Number of Generations:
I've found that 4 to 6 gives a good range of tests.
Same for both Mono and RGB screen printers.
----------------------------------------------------------
If you need help with installing UVTools here is an install tutorial video:
• How to Download and Install UVTools o...
----------------------------------------------------------
If your printer is not compatible with this feature of UVTools then you can use this video to help find the best exposure on your printer.
• Get Perfect 3D Prints on Any Resin Pr...
----------------------------------------------------------
Join a great community of 3D Makers and Tabletop Gamers in the Slice Print Roleplay Facebook Group!
https://bit.ly/395zLSJ
----------------------------------------------------------
If you'd like to support the work I do and get access to some really cool rewards then please consider supporting me on Patreon.
https://bit.ly/3E9g22O
----------------------------------------------------------
For business-related inquiries please contact me at:
[email protected]
----------------------------------------------------------
Find pre-sliced test models for Epax Printers here:
https://epax3d.com/pages/prints-machine
Find pre-sliced test models for Elegoo Printers Here:
https://www.elegoo.com/pages/3d-print...
----------------------------------------------------------
*as an Amazon Associate I earn from qualifying purchases*
Equipment in Video
The printer used was the Epax E6, you can get one Here: https://amzn.to/3q2QVrG
The resin used was Reprapper Gray.
You can get it Here: https://amzn.to/3zB2ATk
----------------------------------------------------------
Partner Sites
MiniHoarder is a fantastic service for buying selling and keeping your mini collation safe!
Get your first month, with any tier, free using my code: letsprintsomething!
https://www.minihoarder.com/
----------------------------------------------------------
Thank you Streambeats for the awesome music!
https://www.streambeats.com/
----------------------------------------------------------