Published On Mar 24, 2024
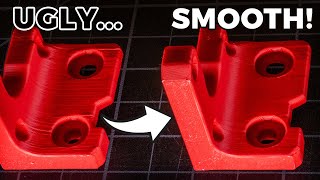
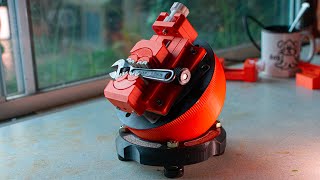
I wanted to use my fiber laser to mark 3d printed parts. I tested out pretty much every filament type I had and figured out all the right settings so you don't have to!
• EzCad2 Tip : How to Adjust Laser Timing
Cloudray QS-50 from Cloudray official website (affiliate link) - https://shareasale.com/r.cfm?b=236292...
• Cloudray QS-50 Fiber Laser - Unboxing...
Hatchbox Matte PLA - https://amzn.to/4a6DCwH
Filamentum Extrafill PLA - https://www.matterhackers.com/store/c...
Bambu Basic PLA - https://store.bambulab.com/products/p...
Overture PLA - https://amzn.to/4aoDJU8
Bambu Matte PLA - https://store.bambulab.com/products/p...
Hatchbox PLA Pro - https://amzn.to/3JbexFj
Polymaker PolyLite PLA - https://amzn.to/3IShaM4
Prusament PLA - https://www.prusa3d.com/en/category/p...
Polymaker ASA - https://amzn.to/3IQSAej
Bambu PLA-CF - https://store.bambulab.com/collection...
Polymaker TPU - https://amzn.to/3vrTYAZ
Overture PETG - https://amzn.to/4aqKbtN
Matterhackers NylonX - https://www.matterhackers.com/store/l...
My Favorite Tools - https://www.amazon.com/hz/wishlist/ls...
00:00 Intro
01:00 Why Fiber Laser?
02:32 Filament Samples
03:08 Laser Settings
05:03 Laser Montage
06:24 PLA Results
07:47 CF, ASA, PETG Results
09:24 Calibration
10:35 Lessons Learned
12:22 Cloudray QS-50