Published On Dec 6, 2020
So today we're porting the F out of our 4AFE cylinder head. But the letter F in the title of this video doesn't mean what you think it does. It's not the naughty F word. It's the F in the 4AFE and today we'll try to get rid of the F as much as possible. As you probably know F in Toyota's engine codes stands for an economy head, while G stands for a performance oriented cylinder head.
As you can see I'm starting by working on the combustion chambers. This is the only area of the cylinder head that I will be slightly reshaping, while everything else will mostly be removal of casting flash and smoothing out rough surfaces and angles that are a consequence of the mass production process. When it comes to porting and polishing the greatest gains are achieved at this early stage of removing mass production imperfections, everything beyond that brings about dramatically reduced gains and mostly serves to push the power band into higher rpms. Some people think that the more your port, the more you enlarge the cross section of the ports, the more hp you gain. In reality, extreme port jobs only benefit all out racing and Motorsport engines that spend most of their life at full throttle and close to the redline. When it comes to all other applications too much porting does more harm than good.
As you can see I'm porting with a carbide burr. If you're completely new to porting I recommend using only cartridge rolls like this. They remove material much slower than carbide burrs but are much safer and less likely to damage something on your head. Carbide burrs are great because they remove material very quickly but they can sometimes hop away or bounce off from the head and can damage your valve seats or other critical areas. This is why I prefer to use carbide burrs with smaller die grinders that are easier to control and hold in your hand. I use two die grinders so I can quickly switch between cartridge rolls and carbide burrs. I do the rough shaping with carbide burrs and finalize with cartridge rolls.
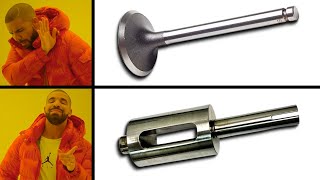
When it comes to the combustion chamber I will be devoting most of the attention to the area around the intake valves and my goal here is to deshroud the intake valves to a reasonable degree to improve flow. I'm building a turbo engine and my goal is to make 300hp from 1.6 liters . In stock form the intake valves are set deep into the head and are shrouded by the combustion chamber, and although this does improve tumbling of the air fuel mixture and efficiency as well as air velocity and low rpm behavior, it doesn't help with making power at higher rpm. if you look at a typical pentroof combustion chamber in a performance cylinder head you will notice that the intake valves are almost never shrouded like this and are given as much room to breathe as possible.
Now we're going to be focusing on the intake ports. As I said there will be no extreme porting here but I will definitely be gasket matching because as you can see there is some pretty massive mismatch between the intake gasket and port. This hurts performance and matching in a case like this can even help a bone stock engine, as this a relatively significant obstacle in the path of the incoming air.
As before the carbide burr ports away the excess metal and the cartridge rolls smooth and blend the surfaces into one. The 4AFE head also has significant casting flash throughout the entire intake port and removing this is an absolute must for any porting job. Compared to the 4AGE heads the 4AFE heads have significantly more casting flash in almost all areas. The 4AFE intake ports are pretty long and narrow so you will need a long grinder attachment. I also like to wrap the attachment in a few layers of masking tape because the attachment itself, when rotating at high speed can do a lot of damage if it hits the gasket sealing area of the port. I'm working with an 80 grit roll here but I finish things off by hand in 150 grit to provide a more uniform finish throughout the port. Here's some before and after of the intake ports.
Our next area of focus is going to be the intake valve bowls. Compared to the port, which is a low risk area the bowl is a high risk area. The seats on this head are good and I want to save them but can't use old valves to protect the seats obviously so maximum care and concentration is needed when working the bowl. One hit to the valve seat usually means that you must replace the seat and that is an added unnecessary cost as well as risk, because not all machine shops can properly execute a valve seat replacement. On top of this most aftermarket valve seats are inferior to OEM ones and I'm not sure OEM ones are still available for this head.
A special thank you to my patrons:
Daniel
Peter Della Flora
Daniel Morgan
William
Richard
Pepe
Brian Durning
Andrew Ruud
D4A merch: https://teespring.com/en-GB/d4a-merch
Patreon: / d4a
#d4a #projectunderdog #porting