Published On Feb 21, 2022
BMW E30 Rear Arch Repair Welding | How To Repair A Rusty Wheel Arch | 017
In this BMW E30 project episode, I finally bite the bullet and get to work on the rear arch rust repair.
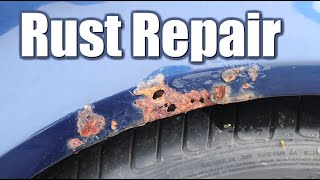
This area of rust on my E30 is by far the ugliest looking part of the car, it's clearly visible and is basically a big rust hole.
Having had some recent success with my welding repairs in doing the rear battery box (see the previous video), I'm ready to step up to the plate and take on a more obvious area on the car and repair it. From that experience, I learned a few things about how to set the welder up, and what kind of thing can and can't be welded. I also found out just how hard it is to cut repair panels that actually fit!
As a result, I jumped straight on eBay to source an E30 rear wheel arch repair panel, and to my surprise, they aren't actually that expensive, I'll link the one I use in the video in this description.
Here's what I use in this video:
Clarke Weld MIG 150 TE Turbo: https://ebay.us/jbdfE8 (this is the newer version)
0.8 Welding Wire: https://ebay.us/eQWqWx
Argon/CO2 Welding Gas & Regulator: https://ebay.us/7BOngD
Angle Grinder Wire Brushes: https://ebay.us/sSJjtM
Dewalt Angle Grinder: https://ebay.us/CmsNuW
Safety Goggles: https://ebay.us/2Dvt5C
BMW E30 Rear Wheel Arch Panel Driver's Side: https://ebay.us/zVTnFt
E30 Rear Wheel Arch Panel Passenger Side: https://ebay.us/4DAloI
With the repair panel having quite a bit more meat on it than I really needed for my rear arch repair, I was left with a few options for how to approach it. As the majority of the wheel arch is actually in excellent condition on this side of the car, I opted to cut the panel down to just the front section.
But before I could get my teeth stuck into welding that fresh metal on, I unfortunately discovered a Pandora's box of rust within the rear rocker panel (or sill/side skirt).
Hidden behind my rusty arch there is a kind of chassis rail box section that spans between the arch and where the door shut line is, and its clearly been sat rotting away for years.
I realised I'd first have to do a rocker panel weld repair which included that inner pressed steel box section.
Luckily this box section is quite well hidden being inside the bodywork of the car, so despite the fact I knew I wasn't going to be able to make a patch that matched its strange, corrugated pressed-steel shape, I was able to weld in a patch of metal which will more than stand up to the job and be sturdy.
With this out of the way, I could then cut my rear arch patch using a method I'd seen the likes of Vtuned and Motorhead.co doing, which is to press your new panel up against the car and cut both your patch and your car's bodywork in one slick motion, leaving you with a patch which fits the hole perfectly. And luckily this trick really worked wonders for me too, I cant see how it could be done any other way without hours of back and forth.
Further to that, I also used a trick I'd seen online where you weld in supports for your patch, this not only lets you get your patch firmed up in position to weld, but it also greatly reduces your chances of blowing through the thin sheet metal with your welder, by giving it a backing to soak some of the heat into.
With this all sorted, I then dove straight into welding the panel in. On a welding job like this, with extremely thin sheet metal, your biggest enemy is the blow-through. This is way too easy to do, and if it happens you will have a very hard time trying to close that hole back up with the welder.
With my Clarke welder set on its absolute lowest setting (dial to 1, switch to Min), I carefully worked my way around the patch doing around 2-second duration tack welds. Giving it ample time between welds and passes to allow the panel to cool down, avoiding warpage.
This took a very long time, but after 2 sessions there were no more gaps in the weld. At which point I got the angle grinder with the flap disc on and ground all of the spot welds down to a smooth finish, then admired my handy work.
The result is great, and while not perfect, remarkable for my first attempt at anything like this. Coming up next will be the rest of the jacking point repair, and also welding in the inner arch.
For more helpful how-to guides and restoration project logs, visit our blog: https://www.spannerrash.com/
As an Amazon Associate, Ebay Partner and Awin Affiliate, we earn a small commission from qualifying purchases. Some of our links are affiliate links, and if you decide to purchase things through them, we earn a small commission. It costs you nothing but helps us to keep the content coming. Thanks for your support!