Published On Apr 21, 2023
The Snapmaker A250T and A350T are versatile machines with the ability to switch between 3D printing, machining, and laser tool heads. In Snapmaker's ambition to make a great all round machine, they seemed to have made some compromises in areas to keep the tool heads very compact.
If you are looking for my original review video, you can find that here:
► • Snapmaker A250T Assembly, Review, 3D ...
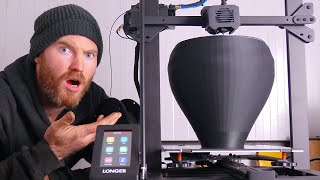
The part cooling fan is slightly undersized for the potential throughput of the hotend. However, what is worse is that the single duct for the part cooling is poorly aimed and being a single sided duct - the output only reaches one side of your print. This often results in parts with one side properly cooled and the other side looking very messy and warped due to receiving NO cooling at all.
To solve this, I designed two upgrades. The first is a dual duct part cooling fan adapter that is a drop in replacement for the original. No modifications are necessary and everything fits in the original location.
With the new dual duct you will notice more uniform appearance of your 3D printed parts. Small details will be sharper and more precise as the plastic will cool faster and prevent warping. In some cases you will be able to slightly increase your print speeds as the new duct will more effectively cool your parts.
What it will not do: Since the original fan is still generally undersized you will not be able to drastically increase your print speeds. The fan is still small and if you would like to try and really increase your speeds I have the 4010 radial fan adapter also presented in this video. The purpose of this first modification is to increase the part quality at the existing print speeds.
The second modification is the 4010 radial fan adapters for those of you who are trying to increase your print speeds more significantly while maintaining part quality.
A regular 24V 4010 radial fan is used and will plug directly into the control PCB on the tool head. The connector is a common JST XH 2.5mm pitch connector.
All of the original hardware is reused with the exception of the requirement for four M2x8 pan head thread forming screws for the 4010 radial fan. If you purchase the kit from me, the hardware will be included.
You can support my work by purchasing these parts from me here:
► https://embracemaking.com/products/sn...
You can find the free dual duct adapter here for download:
► https://www.printables.com/model/4591...
If you are looking for products or items I've used with the Snapmaker A250T in this video, see below. As an Amazon Associate may I earn from qualifying purchases (at no extra cost to you):
Snapmaker A250T:
► https://amzn.to/41qGq3q
Cut to length velcro cable ties:
► https://amzn.to/3Lk2Pdb
4010 Radial Fan 24V
► https://amzn.to/41NxQvn
Bulb Socket - Corded with Switch:
► https://amzn.to/3Agj98y
Vocolinc Smart Bulb:
► https://amzn.to/3V44iYj
Electric Screwdriver Kit
► https://amzn.to/3WhkTYk
Digital Measuring Calipers:
► https://amzn.to/3WddZnd
3 Speed 90,000 RPM Electric Compressed Air Blower
► https://amzn.to/3jnfzEb
Thank you @Snapmaker for generously sending me your product!
0:00 Intro
0:38 Dual Duct Assembly
7:52 Print Quality Comparison
10:46 4010 Part Cooling Fan Assembly
16:36 More Prints
19:03 PEI Flex Plates
20:09 Outro
#snapmaker #3dprinting #maker
****************************************************************************
If you enjoy and have benefited from my content and are feeling generous I would love your support! You can "buy me a coffee" here:
► https://www.paypal.com/donate/?hosted...
By supporting my channel you are encouraging me to continue with this time consuming endeavor.
Follow me on Instagram!
► / embracemaking