Published On Jul 2, 2022
We wanted to create a built-in dry bar in our dining room. In the fourth part of this series, I'll show you how we made the shaker style drawer fronts.
BACKGROUND:
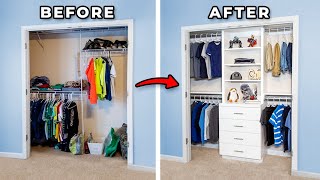
We had a closet that was located in our dining room that we didn't really use, so we wanted to convert it into a dry bar, which we would use! For the sake of time, we originally sought quotes from contractors to make this built-in. However, after receiving quotes of well over $2500 WITHOUT THE FRIDGE, we said, "Screw that! We'll make it ourselves!" So we set out on a mission to make this dry bar, WITH the wine and beverage fridge, for a total cost of under half the quote.
THIS EPISODE:
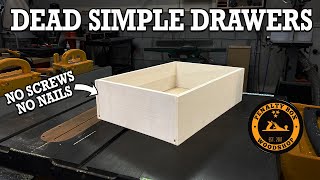
In this part of this series, we built and installed the shaker style drawer fronts. The drawer fronts were constructed using poplar for the "frame" and utility paneling for the center piece.
All of the poplar was planed down to the same thickness (5/8").
The frame of the shaker drawer fronts was constructed using rail and stile joinery. Now they make special router bit sets to do rail and stile joinery, but they are generally pretty expensive, and I don't make drawer fronts often enough to justify the expense. So I show you how I constructed these using a regular table saw blade and a router.
The drawer fronts were painted white to match the cabinetry of the dry bar and antiqued bronze handles were installed as they go well with the slab countertop.
While the focus of this video is on the construction of the shaker style drawer fronts, and NOT how to install the drawer fronts, I give a very quick glimpse of the installation of the drawer fronts. In general, I created holes in the drawer fronts where I wanted the handles to be located. Then I did my best to center the drawer fronts on top of the drawers, and while holding them in place, I used a used a pilot bit in a drill to drill through the holes I created in the drawer fronts and into the drawers themselves. Now that the drawers themselves are marked with where the screws for the drawer handles should be located, I installed the drawer fronts by using the hardware for the handles to hold the drawer fronts on, then I reinforced the hold by installing a couple extra screws from the inside of the drawer into the back of the drawer fronts, making sure the screws were positioned to go into the poplar frame of the drawer fronts and not the panel.
VIDEO CHAPTERS:
0:00 Intro
0:11 Recap of Dry Bar Project So Far
0:39 Shaker Drawers
1:15 Rail and Stile Joinery
2:40 Using Table Saw for Rail and Stile Joinery
3:24 Using Router for Rail and Stile Joinery
4:17 Assembling Shaker Style Drawer Fronts
5:57 Adding a Roundover to Drawer Fronts
7:08 Installing Drawer Fronts
8:01 Outro
MUSIC BY:
- Special shout out to a good friend of mine, Hand of Taurus, who provided me with a track for this video. Go check him out his YouTube channel! / handoftaurus