Published On Apr 7, 2022
Hi everyone! To celebrate 5000 followers on Instagram, I've decided to make this project video. In this video I combine 3 of my main video-topics being: Carbonfiber, 3D printing and Epoxy resin Casting.
The Tutorial is made out of 3 different processes:
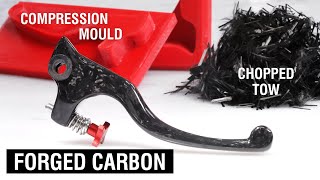
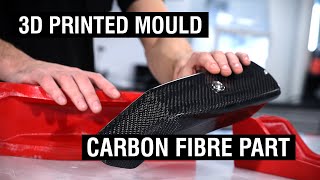
1. Making the carbonfiber plates:
I've decided to go for a more exotic carbonfiber here, being the 160g 15mm Spread Tow 2x2 Twill Carbon Fibre Cloth (1000mm) from @easycompositestv This one has the same looks of regular twill weave carbonfiber but enlarged by weaving spread tow in a twill weave pattern.
The plate is created by first placing the spread tow on a mould (being the glass plate here) Followed by 2 layers of regular twill weave 200g/m² Carbon Fiber. To Create a good resin infusion you'll need to add a layer of peelply (that will be removed after curing) a layer of infusionmesh, resin channels and a vacuumbag. When the vacuumbag is properly placed under good vacuum you can proceed with the resin infusion. For the resin infusion, I'll use the IN2 Resin Infusion Epoxy resin. One of the advantages is that this resin is sold with a fast or slow hardener. By mixing both hardeners you're able to adjust the curing time. It's a bit of a game finding the sweet spot to have a fast cure, but still have enough time to complete a full resin infusion. While doing the infusion it's always good to throttle the resin flow by opening and closing the resin feed line to have the resin infusion not going to fast.
After curing the peelply can be removed with the infusion mesh, leaving a nice glossy carbon fiber plate. The part is sanded with a 400P grit sanding paper, creating a good bond for the casting resin and cleaning the surface of the plate.
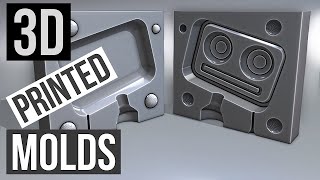
2. Making the 3D printed logo and number
The software I use is Fusion 360, I went quickly through the process here, due to the fact that I believe there are some great tutorials online already with people being able to explain everything in a better way than I do. But if there is a good amount of interest, I might do a basic tutorial later on!
The files are then sliced in Cura and printed on my Creality Ender 3S1 on my carbonfiber bedplate. Printed with a 0.4 Nozzle at 0.2 layer hight with a printbed of 200°C and nozzle temp of 60°C, I've used more layers to avoid having to print with infill on these prints. The material used is PLA
The 3D printed parts are then glued on the carbonfiber using some CA glue to position them and avoid them to float when the resin is poured later on.
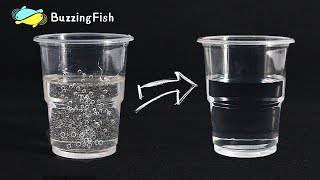
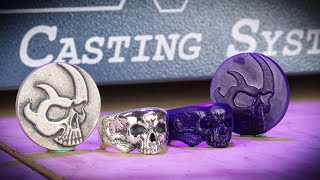
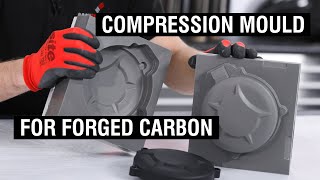
3. Casting the purple Glasscast50 Epoxy Resin:
Unfortunately not everything went as planned here. I was more aiming for a lightly tinted purple translucent casting, making it possible to still see the carbon fiber weave under it. unfortunately the resin was tinted a bit to much resulting in a less translucent cast. For this project I've used the Glasscast50 epoxy from the Easy Composites epoxy casting range. This resin is good for castings up to 25mm, for bigger castings they now have an extra thick pour resin. Keep in mind that the amount of resin mixed will also have an impact on how thick you can pour. Once the resin is poured it is left to cure for over 4 days to reach a good cured stage. After that the part is cured in the oven at 40°C to reach a good post cure and make sure the part is cured enough for sanding and polishing.
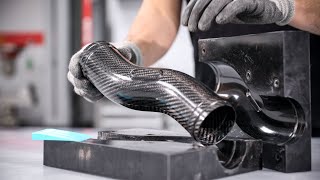
To add an extra feature I wanted to round the edges. I've used a router to do this. It shows that the resin can easily be routed and milled but had some trouble creating a nice rounded edge due to the small dimensions of this piece. Any how I was able to recover the part and proceed to the finishing and polishing stage.
To Sand an epoxy part to high gloss I mostly start with a 150P grit to "clean" the part and edges. After that I proceed to a full sanding of the part using 220,320,500,800,1000. Once done we can proceed to the finishing stages being the polishing. I first use a hard polishing on the polishing wheel. Make sure to move the part while doing this to avoid overheating your epoxy resin. Clean the part and proceed to a softer finishing.
Casting 3D Print In Epoxy Resin (Glasslike Translucent Bubble Free High Gloss Finish)
• Casting 3D Print In Epoxy Resin (Glas...
Making A Carbon Fiber Print Bed For My 3D Printer (how to)
• Making A Carbon Fiber Print Bed For M...
Creality Ender 3 S1 - Good or bad?! Review and examples
• Creality Ender 3 S1 - Good or bad?! R...
Materials used:
160g 15mm Spread Tow 2x2 Twill Carbon Fibre Cloth (1000mm)
https://www.easycomposites.co.uk/160g...
GlassCast 50 Clear Epoxy Casting Resin
https://www.easycomposites.co.uk/glas...
For more of my projects make sure to follow me on:
Facebook: / mat2composites
Instagram: matthieu.libeert
twitter: @matthieutje65
web: https://www.mat2composites.com
#Carbonfiber #3Dprinting #Resin