Published On Oct 17, 2022
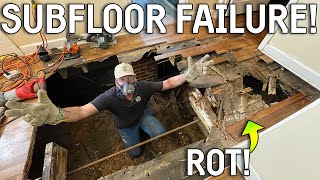
REPAIRING A BOUNCY FLOOR BY SISTERING JOISTS
Disclaimer: https://www.aconcordcarpenter.com/dis...
'
A client recently asked us if we could reduce the “bounce feeling” in their bedroom floor.
Sistering | Doubling the Joists can solve a lot of problems like sagging, uneven, or strengthening undersized floor joists. Sistering adds structural integrity to damaged joists and can also be used to level old floors.
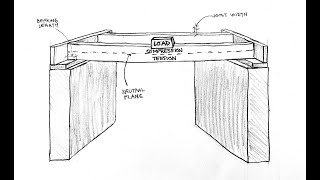
2-Methods of Sistering
Full length sistering is the strongest method, and my preferred method when possible. This method extends the entire length of the joist and has full bearing support at each end. This method requires a minimum of 1-1/2” to 3 inches bearing at each end.
An alternative to bearing is to install joist hangers from a wall or supported blocking.
Mending Plate or Scabbing:
In some remodeling situations, it is too difficult or impossible to get a sistered joist onto a bearing point. I find that in these situations using a mending plate or plywood scabs can help tremendously. A mending plate is typically a 2x joist section fastened to the old section of joist to strengthen it.
There are 2 rules of thumb when installing mending plates:
1. Install the sistered mending joist ⅔ the length of the original joist, this can also be used to fix joist sag.
2. Extend your repair 3 feet on either side of a damaged area. This method reinforces the damaged area, and the joist ends will be able to handle the additional weight of the sister.
“Plywood scabbing” is also an effective technique that allows you to add strength to and fix minor problems that are affecting floor joists. I often use construction adhesive and 8D ring shank nails or structural screws to fasten 3/4-inch plywood as scabs to both sides. When scabbing I try to use the full 8-foot rip of plywood or the longest length that will fit.
8 Steps on Sistering the Entire Floor
1. Remove Plumbing, Wiring, Cross-Bracing and Other Obstructions
First step is to remove any blocking, wiring, plumbing, or HVAC in your way.
2. Measure and Cut the New Joist
If you are running the sistered joist the same length as the old joist, use that joists measurement. If you are sistering a partial joist, use the ⅔ rule if possible.
Pro Tip:
To ease fitting, we cut a 20-degree bevel of the top edge of the joist [1/2’ in and ½” down] this helps the joist slide past the subfloor and into place.
Ensure your new joist has at least 1-1/2” to 3’ of bearing.
3. Install The Joist
Slide the new joist “crown up,” into the space and tilt it up. The goal is to ensure the sistered joist sits snugly against the old joist. If the old joist has sagged, you may have difficulty getting a full-sized sister joist to fit.
If you cannot fit the sistered joist against the old due sagging, you can jack up the old joist to create room.
Pro Tip:
If installing a partial joist, you’ll also need to jack up the old joist to level and then sister the repair to that.
4. Jacking
I position a 6-ton hydraulic jack under the old joist and on top of a board spanning several floor joists. This support board helps spread the downward pressure weight of the jack to the floor below. I fasten two 2×4’s together to make a simple jack post. I then slowly jack the sag out of the old joist in order to get the new joist against the old joist. Jacking too fast can cause wall cracks above and it’s always best to jack slowly and not too much.
After lifting the cracked joist, I used a 3-pound hammer to move the new joist into position.
5. Level Vs Flat
Level is not always achieved but certainly desired. Flat is usually the consolation prize to level, in old houses. We used a combination of strings, levels, and a rotary laser to attempt to get the bottoms of our new joists level. We consider all of this information and raise or lower the jack post as needed. We also sometimes trim the joist bearing edge to assist in in fitment.
6. Fastening
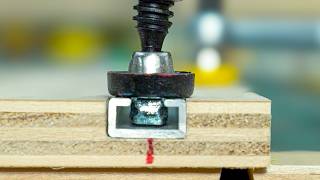
To attach the new joist to the older one, we installed a series of 3-inch Fasten Master Head-LOK structural lag screws in a “W” pattern. Once secured, we released the jack pressure and remove the jack.
7. Install Solid Blocking
The last step is to install solid blocking perpendicular to the joists. Solid blocking helps to transfer weight to adjacent joists. We snap a midspan line, cut our blocks a hair stronger acts as stronger than the space, and tap them in with a hammer.
Install the blocking in a straight ling [not alternating] for the strongest connection.
8. Strap The Ceiling
The last step is to install 1x3 ceiling strapping 16” on-center to the ceiling joists. Strapping is fastened with two 8D ring-shank nails per joist. It seems that strapping is an N.E. kind of thing, but I like it for two reasons.
1. Strapping can be easily shimmed to level out the ceiling
2. Electrical wiring can easily be snaked in the ¾” space for future wiring running, like adding recessed lighting
#FloorRepair #ReinforcingFloorJoist #LevelingFloors #SisteringFloors