Published On Dec 15, 2021
Do you want to turn your Raspberry Pi into a honeypot and watch hackers fail? If so, this is one of my Cyber Security Projects that is meant for you!
Looking to start a career in Information Security, Cyber Security, or Information Assurance? Check out all these resources to Get Started! https://www.jongood.com/getstarted/
Need CAREER COACHING or CONSULTING Services? https://www.jongood.com/services/
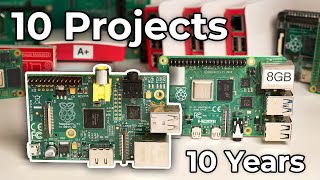
Raspberry Pi’s are extremely popular for lightweight and inexpensive computing solutions around the world. Raspberry Pi’s are being used for just about anything that you can think of that needs light computing power. Since honeypots only need to appear vulnerable, a Raspberry Pi makes it the perfect system to use.
Join me in this video as we walk through the required steps to turn your Raspberry Pi 4 into a honeypot using DShield Honeypot. Once you have setup your Raspberry Pi, you can watch as attackers fail miserably to breach your system.
If you want to follow along, I have all the required hardware here: https://www.jongood.com/resources/pro...
Other Cyber Security Projects with a Raspberry Pi: • Cyber Security Projects for Raspberry Pi
1. Download Raspberry Pi Image Loader: https://www.raspberrypi.com/software/
2. Plug SD card into computer using memory card reader
3. Open Raspberry Pi Image Loader software, and load OS (Bake Your Pi)
4. Load SD card into Raspberry Pi, and then power on device
5. SSH into Raspberry Pi: ‘ssh pi@raspberrypi’
6. Update Raspberry Pi: ‘sudo apt update && sudo apt-get -uy dist-upgrade’
7. Reboot Raspberry Pi: ‘sudo reboot’
8. SSH back into Raspberry Pi: ‘ssh pi@raspberrypi’
9. Install Git: ‘sudo apt-get -y install git’
10. Download DShield Honeypot ( https://github.com/DShield-ISC/dshield ): ‘git clone https://github.com/DShield-ISC/dshiel...
11. Change directories: ‘cd dshield/bin/’
12. Install DShield and follow prompts: ‘sudo ./install.sh’
13. Visit DShield website to create an account and get API key: https://isc.sans.edu/honeypot.html
14. Once installation is complete, you can expose your Raspberry Pi honeypot to the Internet and watch your dashboard as logs are sent.
DShield Website: https://isc.sans.edu/honeypot.html
Blog Post: https://www.jongood.com/raspberry-pi-...
#RaspberryPi #Honeypot #DShield
🔥Training Courses🔥
___________________________________________
Full List: https://www.jongood.com/courses/
👕Merch👕
___________________________________________
https://www.jongood.com/merch
📱Social Media📱
___________________________________________
Discord: https://jongood.com/discord
Facebook: https://jongood.com/facebook
Instagram: https://jongood.com/instagram
LinkedIn: https://jongood.com/linkedin
Twitter: https://jongood.com/twitter
Website: https://jongood.com/
⚡️Lab & YouTube Gear⚡️
___________________________________________
https://www.jongood.com/equipment/
📇Affiliates📇
___________________________________________
https://www.jongood.com/affiliates/
DISCLAIMER: I am an ambassador or affiliate for many of the brands referenced on the channel. As an Amazon Associate, I earn a commission from qualifying purchases.
DISCLAIMER (MUSIC): I only use royalty free music and sound effects.
0:00 ⏩ Introduction
1:20 ⏩ Prepare the oven
1:35 ⏩ Bake your Pi
3:17 ⏩ Power on and update your Pi
4:23 ⏩ Install DShield & dependencies
7:58 ⏩ DShield Reporting
8:29 ⏩ Question of the Day (QOTD)
8:37 ⏩ Final Comments