Published On Jan 5, 2019
5.9 Cummins and 48RE Custom Tuning:
https://www.mm3tuning.com
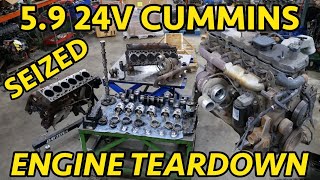
This is how I did an in-frame engine rebuild on my 2005 Dodge Ram 5.9 Cummins engine. I reused my pistons and used an enginetech brand rebuild kit. The rebuild kit and random tools cost about $650 total.
To do an in frame overhaul you need to drain the coolant, remove the intake horn, serpentine belt, grid heater, and exhaust manifold with turbo. After that you need to remove the valve cover and unscrew the wire connectors from the fuel injectors. After that, remove the rocker box. Next remove the fuel rail and the fuel lines between the rail and the injectors and dont forget about the fuel line on the back of the head!. Loosen the injector hold down bolts and remove the injector feed tubes from the cylinder head. Once the tubes are out you can remove the injectors. Now you need to take out the valve rockers, pushrods, and rocker saddles keeping them in order so they go back to the same place they came from. The rear most pushrods have to be slid up through the top of the engine bay (there are 2 holes to allow this) and then rotated forward to remove. Now you can remove the head bolts and discard them. You must use new headbolts or replace with studs due to stretching. Remove the top alternator bolt and rotate alternator out of the mount attached to the cylinder head. Once the headbolts are off you and a buddy should be able to lift the head out. Next you need to loosen the engine mounts on both sides of the engine and jack the engine up about 5 inches to remove the oil pan. Once the oil pan is removed you need to remove the oil pickup tube and the block stiffener (remember where the torx bolt goes!). Lower the engine back into the mounts and remove the piston connecting rod bolts and caps. Keep the caps and piston assembly together because they are NOT interchangeable between piston rods. Once the caps are removed you can bush the piston out of the bore with a 1x2 piece of wood about 2 feet long. If the pistons are severely carbonized you can soak them in a professional carbon removing solution or white vinegar. Once all the pistons are out you can prepare the block for honing by covering up the crank in the bottom of the bores and taping off the coolant and oil passages on top of the block. Hone all cylinders in accordance with your hone manufacturers instructions.
After honing, I cleaned the bottom end of the block out with several cans of brake cleaner and prepared the top of the block for a new head gasket scraping away of the old head gasket and lightly sanding the block. I then vacuumed out all of the coolant and oil passages. Now you can clean up your pistons by removing all of the carbon and make sure to clean out the ring grooves. Install new rings in accordance with the manufacturer of your rebuild kits instructions. Ring gaps should be offset from each other at 120 degrees.
For bearing replacement watch this video: • In-Frame Engine Bearing Replacement and do what he does! The #5 bearing has flanges and can be tricky to get in. I had to bevel the edges slightly to get it to slide in. As you roll in each bearing and replace the main bearing caps afterwards, only hand tighten the caps. Once you have done ALL the bearings, you can go back and tighten the main caps according to the torque procedure here: https://docs.google.com/document/d/13...
Now, after replacing the rod bearings you can reinstall your pistons using a piston ring compressor and taking care to return each piston to the ORIGINAL bore and oriented with the “front” mark towards the radiator. Make sure to maintain the proper ring gap offset! Once you get the piston onto the crank with its ORIGINAL cap, torque according to the spec sheet above. Now you can reassemble your engine in basically reverse order. Pay attention to the torque procedure for the new head bolts/studs and when reinstalling your injectors!