Published On Mar 31, 2024
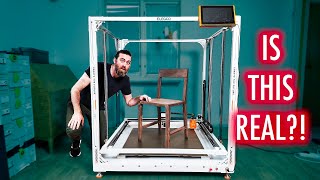
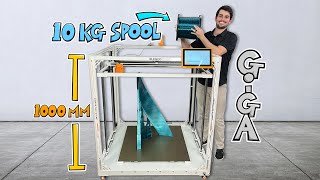
A tutorial of building a High-Speed 3D CoreXY Printer from complete scratch. Can I beat the Bambulabs with a frugal 3D Printer made from available spare parts on hand? Let's find out! :D
PDF guides, BOM, Links & Firmware Samples GDrive link: https://drive.google.com/drive/folder...
A FRANKENSTEIN BUILD:
Like many others involved in 3D printing, one often accumulates spare parts and discarded components from past 3D printer upgrades and modifications. If you have some spares lying around, you can indeed put them to good use by building a fast CoreXY printer out of them.
TESTING THE FORBIDDEN IDEA:
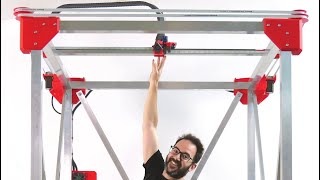
Is it feasible to weld a steel frame for a 3D printer? (A question that has intrigued the 3D printing community for quite some time.) It's an idea that is often dismissed, as the possibility of building a skewed and misaligned frame is highly likely. The video shows how to overcome that obstacle and defy the old 3D printing taboo of using a welded steel frame.
WHY WELDED STEEL?:
3D printers are often built with aluminum profiles costing around +$100 for CoreXY designs. However, if built around a frame made from home-welded steel tubulars, the frame cost would go down to $4. Steel tubulars are common and abundant, as they are used as home construction materials. The idea of using a welded frame also introduces possible benefits for increased rigidity, essential for high-speed CoreXY builds.
MY JOURNEY IN 3D PRINTING:
Building the courage to construct a CoreXY printer was something I had to overcome. I started my 3D printing hobby back in 2015, with the ANET A6 (pre-release) being my first 3D printer. At that time, affordable printers came in kits you had to assemble with a provided box of materials. This experience played a crucial role in giving me an understanding of how 3D printers work. In 2016, I got my first SLA printer (FSL Pegasus) and my second FDM printer (CR10). From 2016 to 2023, my CR10 remained my main workhorse and favorite. I never really had a reason to upgrade to a new printer, as I was happy with my unit. I just needed something that works, and my urge to stay up-to-date in 3D Printing died down. In 2023, upon seeing the release of Bambulabs (the new kid in town), I finally had the urge to buy a new printer. This is when I discovered the world of Vorons and CoreXY communities existed. I had so much 3D printer junk by this time, so I decided to build my 3D printer from scratch in 2023, the MK1. It was a cantilever bed slinger design; I filmed a tutorial for it, but I never released it as I considered it to be a failure, as it was only as fast as any Ender 3 or i3. By the end of 2023, I finally decided to build my MK2 based on a speedy CoreXY design inspired by seeing Vorons. It was a personal project I never got to document into a video. After a few months of use, I was really happy with it! Thus, I made the MK3 specifically to be filmed for this video tutorial.
UPCOMING PREQUEL:
The entire video's original runtime was around 59 minutes long. I had to cut them down into chunks. I made a "How to design a CoreXY" chapter, which was removed from the initial release and will be uploaded separately.
VIDEO CHAPTERS:
0:00 - Intro
0:59 - Frugal Steel Frame Welding
4:45 - Finished Steel Frame Product
5:06 - Flee Market Shopping
6:25 - Component Placement
8:56 - Painting The Frame
9:13 - Prepping The Z Mechanism
10:27 - Linear Rail Assembly
15:49 - Hotend Assembly
18:20 - Belt Drive Assembly
19:13 - Endstop Assembly
19:42 - The Controller
20:09 - Wiring & Cable Management
21:47 - The Power Supply & Octoprint
22:24 - Custom Firmware
25:15 - Calibration Process
26:09 - Quality of Life Mods
27:02 - Test Prints
29:23 - The Verdict
#3dprinting #diy #engineering