Published On Mar 9, 2024
In this step by step tutorial, I will show you how to add flashing LEDs to your 3D Printed Darth Vader Chest Panel. Using 555 timers and a breadboard kit it is very easy to upgrade your Darth Vader cosplay suit.
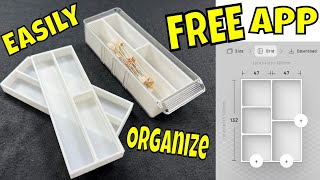
Check out my free STL files on printables so you can make your own:
https://www.printables.com/model/7765...
#3dprinting #darthvader #cosplay
Here are the capacitors and resistors I used in the video, but you can change them to change the speed and frequency of the blinking LED lights.
For 555 timer 1:
Capacitor:
2 - 100uF Capacitors 50V
Resistor 1:
10K ohms
Resistor 2:
10K ohms
Resistor 3:
220 ohms
For 555 timer 2:
Capacitor:
10uF Capacitor 50V
Resistor 1:
100K ohms
Resistor 2:
1M ohms
Resistor 3:
220 ohms
For 555 timer 3:
Capacitor:
2 - 10uF Capacitors 50V
Resistor 1:
1M ohms
Resistor 2:
100K ohms
Resistor 3:
220 ohms
For the sets of 2 LEDs:
330 ohm resistor to the negative of each set
00:00 Introduction
00:21 Breadboard and 555 timers
00:51 Adding Jumpers
01:14 Adding Capacitors
01:52 Adding Resistors
02:30 LED Lights
03:20 Connecting positive and negative
03:42 Placing into 3D print