Published On Dec 17, 2015
Here is the link to the IDEAL Conduit Bender product page. https://www.idealind.com/us/en/shop/p...
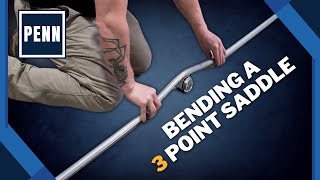
I will take you step by step to show you how to make a 3 Bend Saddle in a length of EMT conduit. Using a good quality hand conduit bender from IDEAL will provide accurate and professional looking bends that electricians expect while on the job.
Hi folks it’s Ron with IDEAL.
In this video I will show you one way to make a three bend Saddle in a ½ inch EMT conduit using a hand conduit bender from IDEAL.
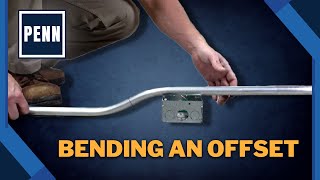
The 3 bend saddle is similar to an offset bend, but this case the same plane is resumed. It is used most often when a pipe is encountered It actually is three bends in the length of conduit that will allow the conduit to go over the obstruction and continue along the path. Most common is a 45° center bend and two 22 ½° outer of bends, but you can use a 60° center bend and two 30° bends. You will use the same calculations for either set of angles and need to make three marks on the conduit to make these bends.
For this demonstration I will use our catalog number 74 – 026 Ductile iron head bender from IDEAL. The ductile iron head benders are typically preferred by the professionals as they will last longer than aluminum bender heads which are lighter weight but less durable.
I’m working with a length of conduit that is 60 inches long and because of the bends we will make to create the saddle bend the overall length of the conduit will shrink by 3/16” for every 1 inch of the height of the obstruction. In this case say the obstruction is this 2” PVC pipe which has an outside diameter of 2 3/8”. I will create a 3 inch saddle bend to go over this pipe with a little bit of clearance. Using a 45° bend for the center bend and two 22 ½° for the outer bends. Using the chart in the Ideal bender guide I can see for a 3 inch obstruction I need to move my center mark ahead by 9/16 of an inch. Which makes sense because 3 x 3/16” = 9/16” it becomes the shrink amount we will use to make the center mark. The chart also says the other two outer marks I need to make on either side of the center mark should be 7 ½ inches away from the center mark.
Step one is to measure the distance from the last coupling to the obstruction. In my example that is 30 inches.
Step two is to add the shrink amount from the table to the measured distance and make your first mark on the conduit at 30” + 9/16” or 30 9/16 inches. Contractors generally use a pencil to mark the conduit so it can be erased later. In my example I will use a permanent marker and mark the conduit all the way around so the mark will not get lost in the conduit head when bending.
The other two marks will be made at 7 ½” on either side of the center mark and again mark the conduit all the way around.
Saddle bends are done in the air not on the ground. Simply stand the bender with the handle pointing down and bender head closer to you.
Step three is to align the center mark on the conduit with the rim notch on the bender head. Then bend your knees and lower your center of gravity, set 1 foot next to the bottom of the bender handle near the ground to hold it in place and then tuck the conduit under your arm and bend the conduit to 45° using steady pressure to prevent any wrinkles or kinks. The bottom of the conduit will be lined up with the 45° mark on the bender head.
Step four is to slide the conduit down to the outside mark that is closest to you. Lineup this outside mark with the arrow on the bender head. Keep in mind you want to keep everything you have already bent on the other side of the bender head away from you. For these two outer bends the hook of the bender is pointing at the center bend of the saddle. Then rotate the conduit by 180° and using the handle of the bender lineup or align the first bend with this 2nd bend. Any time you’ve got two or more bends in a pipe, there’s the potential for what electricians call a dog-leg if the bends aren’t aligned. This creates a problem in the wall and doesn’t make for a professional looking bend.
Then using firm pressure again bend the conduit two 22 ½° again the bottom of the pipe will be even with the 22 ½° mark on the bender head.
#RonKipperFromIDEAL #IDEALINDUSTRIES #IDEALConduitBenders