Published On Dec 26, 2021
Hi everyone!
Welcome to this new series of videos (4 In total)
All about making an RTM mould to produce composite parts in a fast way.
Through these adventures I'll take you to the final result of making an RTM Fiberglass mould and making parts out of it.
RTM moulding is something I haven't done yet and always wanted to try one day. The big advantages of RTM moulding is that you get a good surface on both sides of the parts. It also makes it possible to produce parts in a faster way, due to the fact that you don't need to apply any vacuum supply and bags. Another advantage is a reduction of waste that is created using the regular technique of VARTM resin infusion.
If you want to watch my first video again (cringe):
https://www.youtube.com/watch?v=0tosb...
If you want to watch the video where commented on my first video:
https://www.youtube.com/watch?v=QU5t7...
The video series is separated in 4 Parts:
The video series is separated in 4 Parts:
1. Finishing the master with Pattern Coat from @Easy Composites Ltd and getting it mould ready: • RTM Mould - Finish Part With Patternc...
2. Creating the base-mould out of uni-mould tooling resin and solving some issues I had with the mould: • RTM Mould - Making the first mould (P...
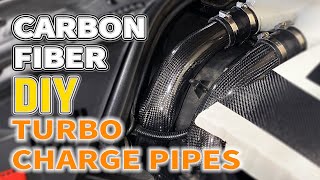
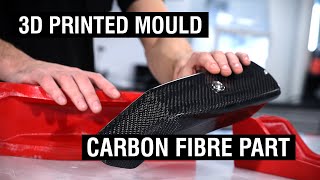
3. Creating The fiberglass RTM topmould by first making a carbonfiber part out of the basemould: • RTM Mould - Creating Negative Fibergl...
4. Creating parts with the RTM mould: • RTM Mould - Creating Carbon Fiber Par...
*In Previous video's:
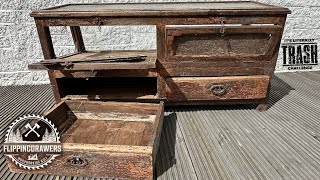
Back in the days (more than 7 years ago I started working with composites) At school we had a sample mould and so decided to use it to make my first steps into composites and resin infusion VARTM. Back then I was way less experienced and watching that video over again, I saw a lot of room for improvement. This is why I decided to redo this video but taking everything next level to challenge myself a bit.
I'll take you through the steps of using one of the parts (fiberglass and polyester resin) I've made back then and get everyting ready for making a new mould. First step is removing any paint that I've put back then on the part (It was a 1K rattle spraycan paint) that might cause any problems with the gelcoat. Sanding the part also made sure that any residue like dust, oil, silicones, glue was removed from the part so we could start fresh.
*In this video:
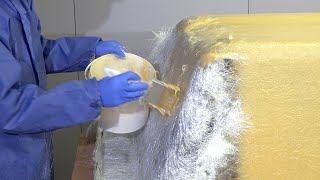
Easy lease (chemical release agent) from easy composites was used to have a good release at the end. In this video I'll use the uni-mould tooling system from easycomposites. It's a 3 part system to make moulds consisting out of a gelcoat, coupling coat, tooling resin.
The gelcoat (black) was applied by brush. Mix your gelcoat with hardener MEKP in a ratio between 1%-2% depending on your wishes. Temperatures and amount mixed might cause the gelcoat to cure faster or slower. a general rule is to mix 600g/m² area to cover. So if necessary mix it in 2 batches to have enough time to apply it properly in a thin layer over your entire mould.
The second coat to apply is the Coupling coat. The coupling coat will make sure you have a good bond between your gelcoat and tooling coat that will follow after this layer. About the same amount of the gelcoat that you've used before is mixed with 1-2 percent of MEKP hardener. Use a 100g chopped strand to cover the entire mould with the coupling coat resin. Use a roller to evenly spread the resin, remover airbubbles and tightly fix it to your gelcoat.
After the coupling coat is cured but still tacky you can proceed to the next step using the tooling resin. The way you apply it is the same as using the coupling coat. The few differences are the amount that you'll need and the chopped fiber reinforcement (400g/m²) apply 3-4 coats over your entire mould and let it cure. Work in small areas you'll focus on to avoid having your resin go in an exothermal reaction.
Once the mould was made, I was a bit dissapointed with the result. I had a few wrinkles but everything was fixed using the following steps. Fix your gelcoat mistakes (watch seperate video on my channel) To fix the big area Glass Cast 50 was used and poured over the entire surface after making the mouldbox.
Once done you can sand and polish the mould to a high gloss. Ideally using 400P,600P,800P,1000P sanding grit (depends on personal preferences) Then polish the mould. Apply release agent and your ready to start making your parts.
For all products used, check https://www.easycomposites.co.uk
they now also have a .eu website for european customers!
For more of my projects
Make sure to follow me on:
Facebook: / mat2composites
Instagram: matthieu.libeert
twitter: @matthieutje65
web: https://www.mat2composites.com
#Mould #Easycomposites #Carbonfiber